Underfloor Heating Retrofit: Electric Mat Design in Bali
Underfloor Heating Retrofit: Electric Mat Design & Installation in Bali
Specific Problem/Question
Many Bali villa owners ask a focused question during renovation: can we retrofit electric underfloor heating mats without major demolition, and will they withstand Bali’s tropical humidity, salt-laden air, and frequent wet mopping while delivering premium comfort? The short answer: yes—when the system, wattage, substrates, adhesives, controls, and protective electrical measures are selected and installed to a finishing standard that suits Bali’s climate and local regulations. Below is Teville’s technical guide for achieving durable, even, and safe warm floors within a tight retrofit build-up.
Technical Deep Dive: What Works in Bali and Why
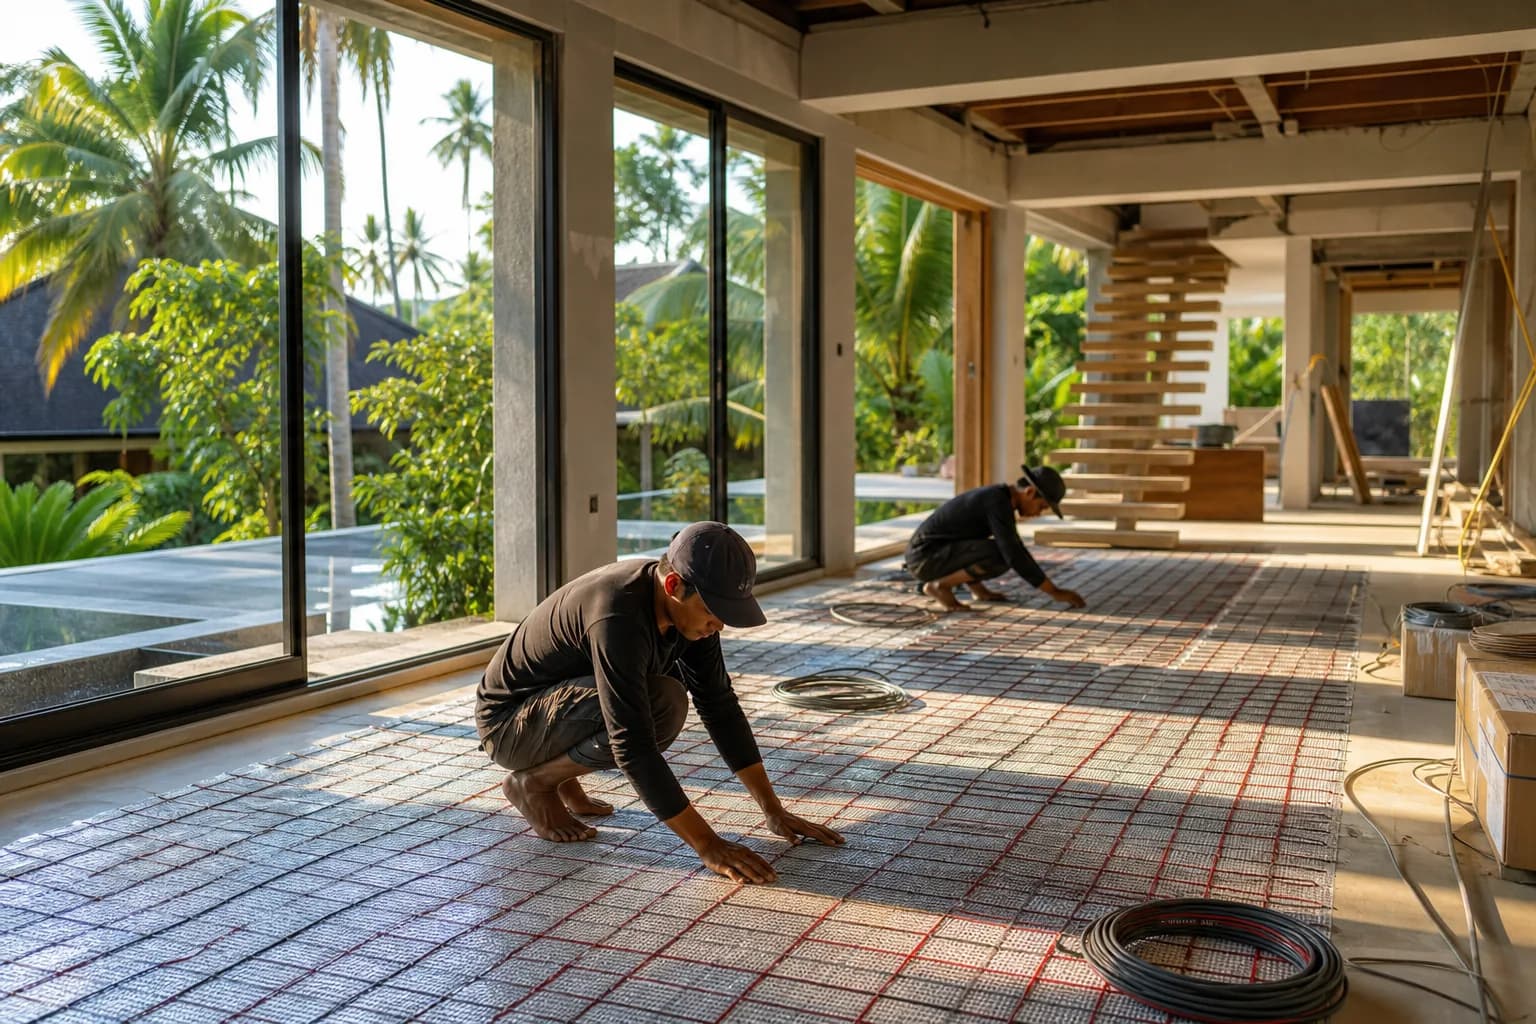
In Bali villa construction and renovation, underfloor heating is not about combatting winter cold but about elevating comfort: drying bathroom floors faster, eliminating the “cold shock” of polished stone or porcelain at night, regulating humidity at the surface, and protecting premium finishes. For retrofit projects, electric heating mats are the optimal solution because they are thin (typically 3–5 mm), fast to install, and easy to zone with smart thermostats. All-in-one mat kits from reputable suppliers—such as ProWarm and MAXKOSKO—offer pre-spaced cables bonded to mesh, ensuring consistent heat density and simplified layout. For ultra-low build-up over existing tile, thin mats like Danfoss are advantageous. Technical guidance from Warmup also underscores the importance of even spacing and no overlaps.
Wattage and density: In tropical interiors, 100–130 W/m² is typically sufficient for comfort heating under tile/stone. For areas with higher heat loss (large window-to-floor ratios, ground-contact slabs, shaded damp bathrooms), 130–150 W/m² may be justified. Avoid exceeding manufacturer temperature limits beneath vinyl or engineered wood; many systems cap floor temperature at 27–29°C for resilient finishes and 32°C for tile/stone, enforced by a floor sensor.
Build-up and thermal management: Retrofitting onto existing substrates demands minimal height gain and maximum upward heat efficiency. Insulation backer boards (XPS or cement-faced, 6–10 mm) dramatically reduce downward heat loss and shorten warm-up times—crucial for energy efficiency and responsive control. Where height is extremely constrained, a decoupling membrane with embedded cable or a thin mat directly over a well-primed, level substrate is viable, accepting a slightly slower warm-up.
Moisture and corrosion control: Bali’s humidity and coastal salinity stress electrical components and metalwork. Specify mats with robust fluoropolymer insulation and a continuous earth braid; tinned copper shielding improves corrosion resistance. All joints and cold-tail connections must be factory-sealed with IP-rated encapsulation. Substrate moisture should be tested and remediated (damp proofing or moisture-tolerant primers/adhesives) to prevent bond failure or efflorescence under the finish.
Electrical protection and controls: Connection must follow Indonesian practice with a licensed electrician. A dedicated RCD (30 mA) and correct MCB sizing are mandatory for bathrooms and wet zones. Thermostats—preferably Wi‑Fi enabled from the kit ecosystem (e.g., LuxHeat or ProWarm Learning Hub)—manage schedules and floor limits. Floor sensors run in a conduit to enable future replacement without disturbing the finish. Zoning by room or functional area (e.g., shower, vanity run, circulation) delivers precise comfort and avoids heating under fixed furniture.
Compatibility with finishes: Tile and natural stone are ideal due to high thermal conductivity and tolerance for higher setpoints. LVT/vinyl and engineered wood require low-temperature limits and manufacturer-approved adhesives. For Bali’s interior finishing, flexible polymer-modified thinset for tile and high-tack pressure-sensitive adhesive for vinyl mitigate shear and thermal cycling stress. Joints and perimeters need expansion allowances; movement accommodation is non-negotiable in humid, thermally active environments.
Quality finishing outcomes depend on three elements: substrate flatness (usually achieved with a polymer-modified self-levelling compound), precise mat bonding without air pockets, and a controlled cure before commissioning. Teville’s finishing teams coordinate civil, MEP, and interiors to ensure the underfloor system integrates cleanly with villa utilities, furniture installation clearances, and final floor heights.
Materials & Standards: What We Specify
- Heating mats and kits: Pre-spaced mesh mats with fluoropolymer-insulated heating cable and earth braid from manufacturers such as ProWarm, MAXKOSKO, Danfoss, and guides from Warmup.
- Insulation boards: XPS or cement-faced boards (6–10 mm) for retrofits; mechanically fix or bed in approved thinset on rigid substrates.
- Primers and SLC: Moisture-tolerant acrylic/epoxy primers; polymer-modified self-levelling compound for encapsulation and flatness.
- Adhesives and grouts: C2TES1 flexible thinset; deformable grouts/sealants suitable for thermal movement and frequent cleaning.
- Thermostats and sensors: Programmable/Wi‑Fi thermostats with in-floor NTC sensor; secondary ambient sensor optional for mixed control.
- Electrical protection: 230 V, 50 Hz supply; RCD (30 mA) for each heated zone in wet areas; correctly rated MCB; junctions within accessible IP-rated boxes where required.
- Local compliance: Work by a PLN-licensed electrician per Indonesian electrical practice and applicable national standards; ensure bathroom zoning, bonding, and equipotential requirements are observed.
- Documentation: As-built drawings, resistance/insulation test logs, product warranties, and O&M manuals handed over to the owner.
Teville’s finish standards align materials to Bali’s tropical conditions—prioritising corrosion resistance, moisture management, and longevity within tight retrofit build-ups. Explore our approach across completed villas in our portfolio and project catalog.
Step-by-Step Process: Teville’s Retrofit Method
1) Survey and design brief
We confirm intended areas (e.g., bathrooms, spa zones, entry runs), finish type, available floor height, and existing substrate condition. We review breaker panel capacity and route options to thermostats. We mark fixed furniture and built-ins to avoid heating beneath cabinetry, wardrobes, vanities with solid plinths, or under major appliances.
2) Substrate assessment
We check flatness (2 m straightedge), bond soundness, cracks and movement joints. Where moisture risk exists (ground floor slabs, wet rooms), we conduct spot moisture tests. Any cracks are bridged or repaired; weak toppings are removed.
3) Pre-retrofit preparation
The surface is cleaned, de-greased, and primed per product data sheets. If height allows, we install 6–10 mm insulation boards to reduce downward losses; boards are mechanically fixed or bedded in thinset and taped at joints.
4) Layout and dry-fit
We plan mat coverage to leave clearances from drains, walls, and sanitary fixtures, and never cross or overlap heating cables. Mats are rotated and cut only through mesh, not cable, per manufacturer guides. A conduit path for the floor sensor is set from thermostat location to the heated area; sensor tip lands mid-cable spacing for representative readings.
5) Electrical rough-in
A licensed electrician installs thermostat back boxes, conduits, and dedicated RCD/MCB. Cold tails from mats are routed to the box without strain and with IP-rated transitions where necessary. All joints remain accessible as per local best practice.
6) Testing before embedment
We record cold resistance (ohms) against the product label and check insulation resistance with a 500 V DC megohmmeter—seeking values typically ≥10 MΩ. Readings are logged now, after fixing, and after final covering.
7) Fixing the mats
Mats are bonded using compatible adhesive, hot-melt spots, or pressure-sensitive sprays as recommended by the supplier. We maintain uniform spacing and smooth down mesh to eliminate voids. For loose cable zones (niches, odd shapes), we use fixing strips at the same W/m² density.
8) Encapsulation
We encapsulate with a polymer-modified self-leveller (3–5 mm coverage above cable) or proceed directly with thinset for tile if the system allows. Encapsulation protects cables during tiling and improves heat distribution.
9) Finishing layer
– Tile/stone: Install with flexible C2TES1 adhesive; honour movement joints and create perimeter breaks with compressible foam. Grout with deformable grout.
– LVT/vinyl: Apply approved adhesive; verify max floor temp (usually ≤27–29°C) and acclimatise materials.
– Engineered wood: Float or glue per manufacturer; set strict temperature caps and ramp rates.
10) Cure and commissioning
We observe full curing windows for SLC/adhesives (often 24–72 hours; longer for epoxies or thicker beds). Initial heat-up uses a gentle ramp to avoid thermal shock. Thermostat is programmed with schedules, floor limits, and boost cycles; Wi‑Fi pairing is completed where applicable.
11) Handover
We provide as-builts showing cable routes (photos taken before covering), resistance logs, warranties, and user training. This documentation is vital for future renovation Bali works or furniture installation changes.
Our construction process synchronises finishing details with villa utilities to protect the system long-term—particularly in bathrooms and spa suites that see daily wet cleaning.
Costs & Timeline
Costs vary by area size, finish, and build-up constraints. Typical 2026 Bali supply-and-install ballparks:
- Heating mats: IDR 700,000–1,600,000 per m² (brand/spec dependent).
- Thermostat and sensor: IDR 1,200,000–3,000,000 per zone (Wi‑Fi at the upper range).
- Insulation boards (6–10 mm) installed: IDR 250,000–500,000 per m².
- Primers, SLC/encapsulation, adhesives, grouts: IDR 150,000–350,000 per m².
- Installation labour and electrical connection: IDR 300,000–700,000 per m², plus breaker/RCD upgrades if needed (IDR 1,000,000–5,000,000 per zone).
As a reference, a 4–6 m² bathroom typically lands in the IDR 7–16 million range depending on insulation use, tile scope, and control selection. Larger open areas price more efficiently per m².
Timeline per zone: 2–5 working days including survey, substrate prep, mat install, and finishing; add curing time (2–7 days) before commissioning depending on adhesives and thickness. For multi-room phasing or occupied villas, Teville sequences works to maintain access. For an exact quote and schedule, see our cost estimation form.
FAQ: Bali-Focused Answers
No. We operate at low setpoints for comfort drying and mild warmth. Smart thermostats modulate runtime based on floor temperature, not air heating.
Yes—when installed with a 30 mA RCD, correct bonding, IP-rated terminations, and a floor sensor-limited thermostat. These are standard in Teville installations.
A 4 m² bathroom at 130 W/m² is 520 W. With schedules and insulation, daily runtime is modest (often 1–3 hours cumulative), focused on usage windows.
Tile/stone offer best responsiveness. Vinyl/engineered wood require lower max temperatures—set by the thermostat—and compatible adhesives or underlays.
Mats are faster and more uniform; loose cable suits irregular areas and niches. Many projects mix both for full coverage.
Yes
 3127 m²9 month(s)from 177.000 USD
Mukunda
 3104 m²11 month(s)from 99.000 USD
TALA 100

Want to calculate?
 4344 m²16 month(s)from 290.000 USD
Radha
 1from 198.000 USD
Private: Haridas Villas
 164 m²7 month(s)from 79.000 USD
Private: Haridas Villas, Tegallalang
 172 m²8 month(s)from 120.000 USD
Keshava
 3173 m²6 month(s)from 125.000 USD
TALA FOUR
 3180 m²7 month(s)from 142.000 USD
Vasudeva
 3124 m²6 month(s)from 123.000 USD
TALA 8
 2144 m²11 month(s)from 104.000 USD
Narayana
164 m²7 month(s)from 79.000 USDTALA TWO
Start With Real Numbers, Not Guesses
Before finalizing your finishing works plan, check realistic cost ranges for your Bali villa project.
Available lands
 2800 m²2 min$ 713793Bali, Kedungu
 1000 m²8 min$ 134544Bali, Bukit
 2000 m²5 min$ 1440887Bali, Pecatu
 2000 m²15 min$ 110837Bali, Karangasem
 18900 m²2 min$ 6912931Bali, Pecatu
 1000 m²10 min$ 123154Bali, Jimbaran
 1410 m²15 min$ 390702Bali, Tabanan
 800 m²8 min$ 113300Bali, Ungasan
 1430 m²5 min$ 209862Bali, Klungkung
 550 m²15 min$ 164594Bali, Mengwi
 2000 m²15 min$ 523000Bali, Canggu
 700 m²15 min$ 162500Bali, Tabanan
 4270 m²10 min$ 394397Bali, Ubud
 8313 m²15 min$ 716670Bali, Buduk
 6000 m²30 min$ 55419Bali, Tabanan
Planning a build in Bali?
Get a feasibility view, budget range and timeline from Teville.
Related guides
Resin-Infused Plaster Finishes: Anti-Salt Systems Bali
Expert technical guide: Resin-Infused Plaster Finishes: Anti-Salt Systems Bali
8 min read
Prefinished Timber Joinery: Silicone Seals Fixings Bali
Professional prefinished timber joinery installation in Bali with silicone seals and fixings for durable weatherproof performance and a premium finish.
10 min read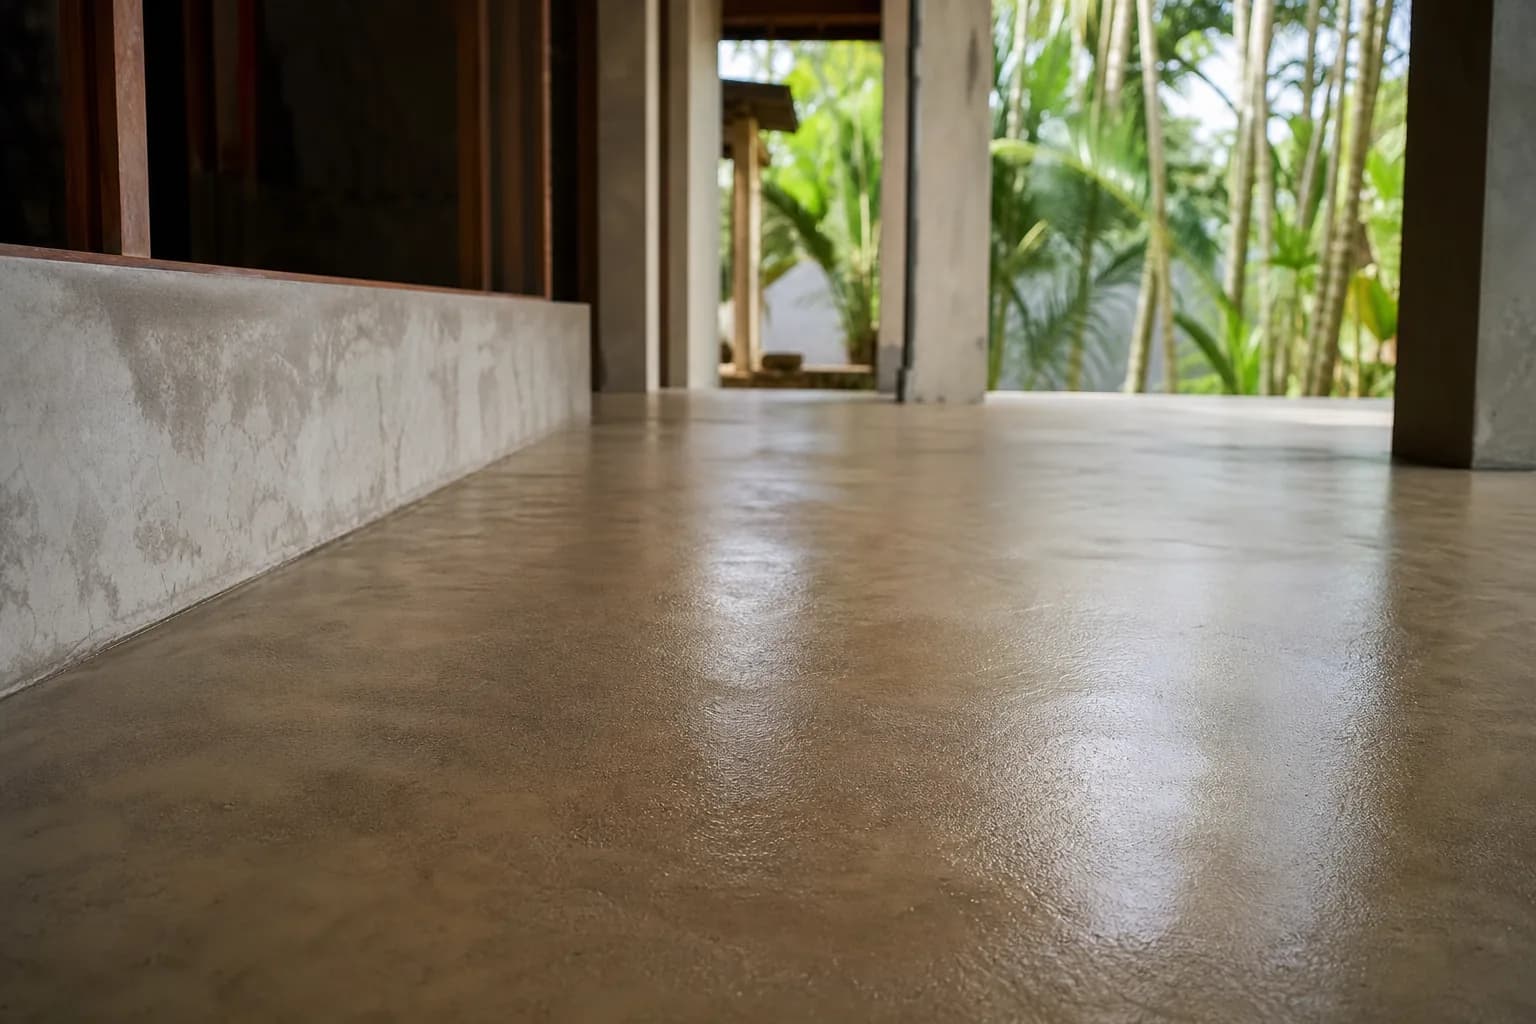
Polished Concrete Microtopping: Surface Prep Sealants Bali
Discover Bali s polished concrete microtopping: expert surface prep, durable sealants, and a flawless finish for modern floors with minimal maintenance.
9 min read