Bathroom Exhaust Fan Ducting: Mold Prevention in Bali
# Bathroom Exhaust Fan Ducting: Mold Prevention in Bali Villas
The Hidden Threat in Bali Villa Bathrooms
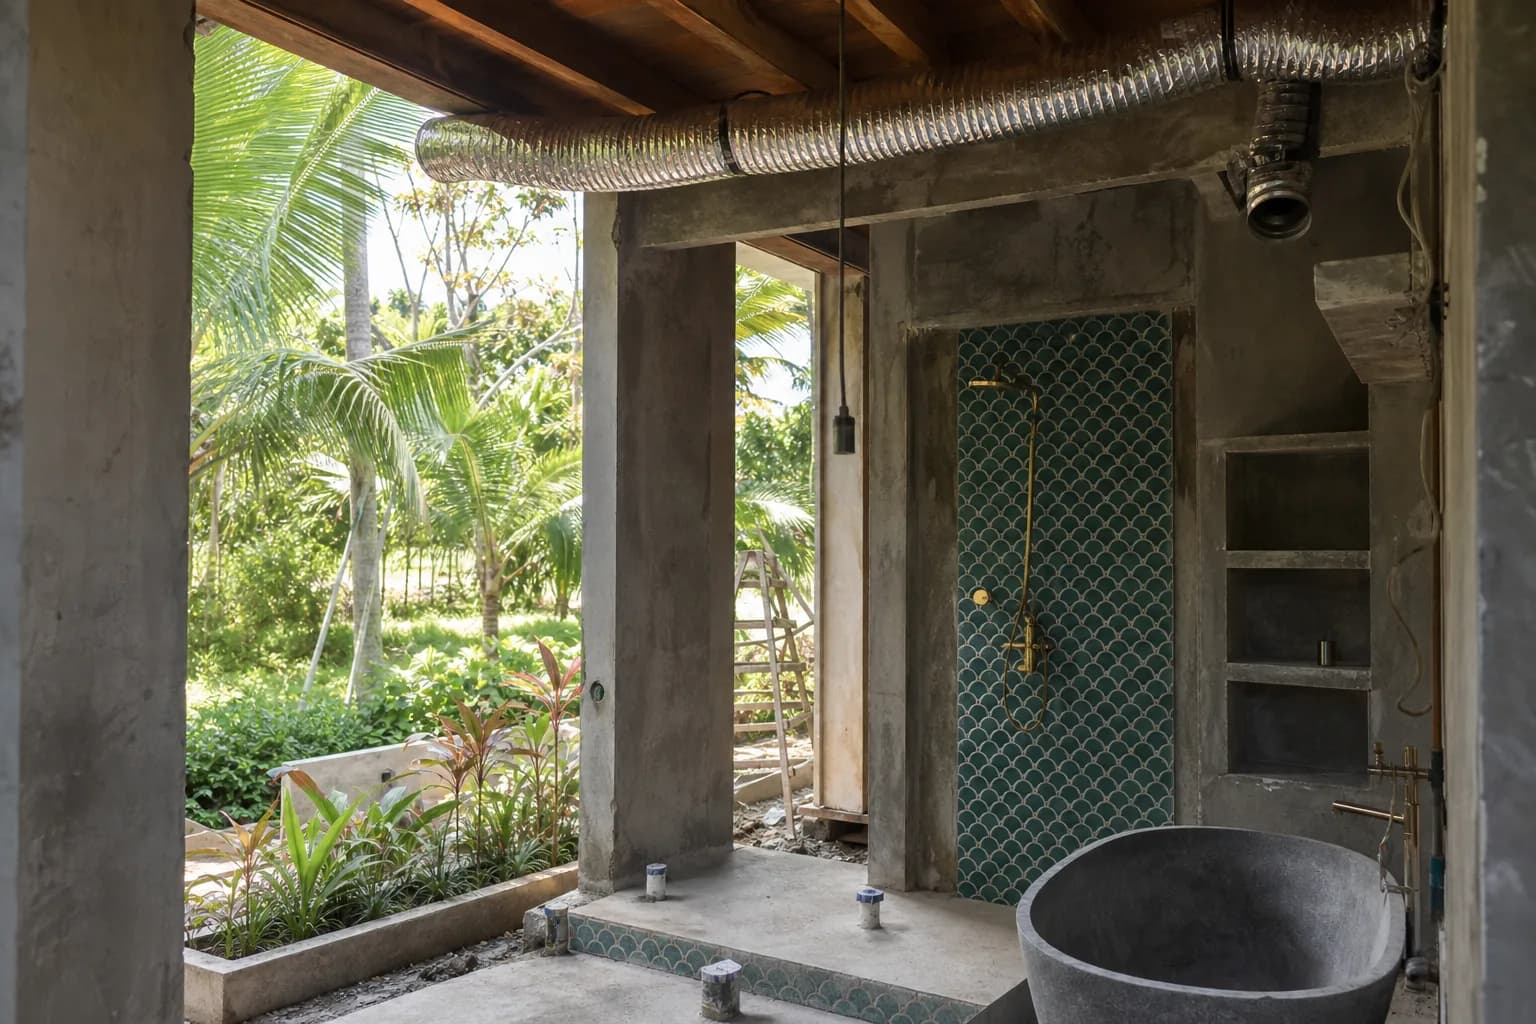
Mold growth in Bali villa bathrooms isn’t just an aesthetic problem—it’s a structural and health hazard that stems from one critical installation failure: improperly ducted exhaust fans. In Bali’s tropical climate, where humidity regularly exceeds 80% and rainfall is abundant, bathroom moisture that isn’t properly expelled creates the perfect breeding ground for mold spores. Many villa owners discover black mold on ceilings, walls, and grout lines within months of construction, not realizing their exhaust fan is venting moisture directly into the ceiling cavity or attic space rather than outside. This fundamental finishing error transforms what should be a protective system into a mold incubator, compromising indoor air quality and requiring expensive remediation.
Technical Deep Dive: Why Proper Ducting Is Critical in Bali’s Climate
Bathroom exhaust fan ducting in Bali villa construction requires understanding the unique challenges of tropical moisture management. Unlike temperate climates where occasional ventilation suffices, Bali’s consistent high humidity means bathroom exhaust systems must work continuously and efficiently to prevent moisture accumulation.
The Science of Moisture and Mold in Tropical Environments
When hot shower steam meets cooler surfaces in inadequately ventilated bathrooms, condensation forms immediately. In Bali’s climate, this condensation doesn’t evaporate quickly—it lingers. Mold spores, which are omnipresent in tropical environments, require only three conditions to colonize: moisture, organic material (like wood, drywall, or grout), and temperatures between 15-30°C. Bali’s year-round temperatures of 26-32°C provide the perfect incubation environment. Without proper exhaust fan ducting that removes moisture-laden air completely from the building envelope, you’re essentially creating a controlled mold cultivation system.
Common Ducting Failures in Bali Villa Construction
The most prevalent mistake in villa utilities installation is terminating exhaust ducts in ceiling cavities, attic spaces, or soffit areas. This practice, sometimes used to avoid exterior penetrations, simply relocates the moisture problem rather than solving it. The trapped humid air condenses on cooler surfaces within these concealed spaces, saturating insulation, rotting timber framing, and creating extensive mold colonies that remain hidden until significant damage occurs.
Another critical failure involves using flexible ducting without proper support or with excessive length and bends. Each 90-degree bend in ductwork reduces airflow efficiency by approximately 25%. In Bali’s humid conditions, this reduced airflow means moisture lingers longer in bathrooms and condenses within the duct itself, creating mold growth inside the ventilation system that then distributes spores throughout the bathroom with each use.
Proper Termination Points for Bali Villas
Exhaust ducts must terminate completely outside the building envelope—through exterior walls or roof penetrations with proper weatherproofing. For renovation Bali projects, this often requires creative routing to reach exterior termination points without compromising structural integrity or aesthetic design. Wall terminations should be positioned at least 3 meters from windows, doors, or air conditioning intakes to prevent moisture re-entry. Roof terminations require specialized flashing systems that withstand Bali’s intense rainfall while preventing water infiltration around the duct penetration.
Sizing and Capacity Requirements
Proper fan sizing for Bali bathrooms requires calculating air changes per hour (ACH) based on room volume. The minimum standard is 8 ACH for bathrooms, but Bali’s humidity demands 10-12 ACH for effective moisture control. A standard 3m x 2.5m x 2.8m bathroom (21 cubic meters) requires an exhaust fan rated at minimum 210-252 cubic meters per hour (CMH). Many builders install undersized fans rated at 150 CMH or less, which cannot overcome duct resistance and effectively remove moisture in tropical conditions.
Materials and Standards for Tropical Climate Ducting
Ductwork Material Selection
For interior finishing Bali projects, ductwork material selection directly impacts system longevity and mold resistance. Rigid PVC ducting is the optimal choice for Bali installations—it doesn’t support mold growth, resists corrosion from humid air, and maintains smooth interior surfaces that maximize airflow efficiency. Schedule 40 PVC pipe in 100mm or 125mm diameter provides the structural integrity needed for long duct runs while remaining cost-effective.
Galvanized steel ducting offers durability but requires careful sealing at all joints to prevent rust in Bali’s humid environment. Aluminum ducting provides corrosion resistance but costs significantly more than PVC without substantial performance benefits for residential applications. Flexible ducting, while convenient for installation, should be avoided for runs longer than 1.5 meters—its corrugated interior creates airflow resistance and provides surface texture where condensation and mold can accumulate.
Sealing and Insulation Requirements
Every duct joint must be sealed with mastic sealant or aluminum foil tape rated for humid environments—standard cloth duct tape degrades rapidly in Bali’s climate. Duct insulation is essential for any ductwork passing through air-conditioned spaces or ceiling cavities. Closed-cell foam insulation with minimum R-4.2 rating prevents condensation on duct exteriors, which otherwise creates secondary mold problems in concealed spaces.
Termination Hardware and Weatherproofing
Exterior termination points require specialized components for Bali’s weather conditions. Wall caps must include spring-loaded backdraft dampers that prevent rain infiltration and pest entry while allowing unrestricted exhaust airflow. Stainless steel or powder-coated aluminum termination caps resist corrosion from salt air in coastal areas. Roof penetrations require custom flashing integrated with the villa’s waterproofing system—this is critical finishing quality work that prevents the most common source of roof leaks in Bali villas.
Step-by-Step Installation Process for Mold-Resistant Ducting
Phase 1: Planning and Layout (Pre-Installation)
Before any physical work begins, proper planning determines system effectiveness. Map the shortest, straightest route from the bathroom ceiling to an exterior termination point, avoiding unnecessary bends. Identify structural elements (beams, columns, electrical conduits) that might obstruct the duct path. For multi-story villas, vertical chases provide the most efficient routing. Document the planned route with measurements and photographs—this becomes essential for future maintenance access.
Verify the exhaust fan CFM (cubic feet per minute) or CMH rating matches the calculated requirement for the bathroom volume plus duct resistance. Add 1 CFM per foot of duct length and 25 CFM for each 90-degree elbow to determine the required fan capacity. This calculation ensures the installed system actually moves sufficient air despite duct resistance.
Phase 2: Duct Installation and Routing
Install rigid PVC ducting using proper support hangers every 1.2 meters to prevent sagging, which creates condensation pools. Cut duct sections with a fine-tooth saw to ensure clean edges that seal properly. Apply PVC primer and cement to all joints, then reinforce with mastic sealant for absolute moisture-tightness—any air leakage reduces system efficiency and allows moisture to escape into ceiling cavities.
For unavoidable bends, use two 45-degree elbows rather than a single 90-degree elbow to reduce airflow resistance. Maintain consistent duct diameter throughout the entire run—reducing diameter to navigate tight spaces creates bottlenecks that dramatically reduce airflow. Where ducts pass through air-conditioned spaces, wrap with closed-cell foam insulation secured with adhesive and vapor barrier tape.
Phase 3: Exterior Penetration and Weatherproofing
Creating the exterior penetration requires precision to maintain the building’s weather envelope. For wall penetrations, drill the pilot hole from inside, then cut the final opening from outside to prevent interior wall damage. Install the duct with a slight downward slope (minimum 1:50 gradient) toward the exterior to drain any condensation that forms. Seal the annular space around the duct with expanding polyurethane foam, then apply exterior-grade silicone sealant for weather-tightness.
Install the exterior termination cap with stainless steel screws and additional silicone sealant around the mounting flange. Verify the backdraft damper operates freely—stiff dampers increase system resistance and reduce airflow. For roof penetrations, integrate custom metal flashing with the existing roof membrane or tile system, ensuring water sheds away from the penetration in all directions.
Phase 4: Fan Installation and System Integration
Mount the exhaust fan housing securely to ceiling joists—never rely solely on ceiling material for support. Connect the fan outlet to the ductwork with a flexible connector (maximum 150mm length) to isolate vibration and noise transmission. Seal this connection thoroughly with mastic and foil tape. Wire the fan to a dedicated switch or humidity sensor control—automatic humidity sensors that activate at 60-70% relative humidity provide optimal mold prevention without requiring occupant intervention.
Phase 5: Testing and Commissioning
After installation, conduct airflow testing using a flow hood or tissue paper test at the fan grille. The tissue should be held firmly against the grille by suction. Check for air leakage at all duct joints by running the fan and feeling for escaping air in ceiling access areas. Verify the exterior termination shows strong airflow and the backdraft damper opens fully during operation. Document the installation with photographs and provide the villa owner with maintenance guidelines.
Costs and Timeline for Professional Installation
Material Cost Breakdown
For a typical Bali villa bathroom with a 4-6 meter duct run, material costs range from IDR 2,500,000 to IDR 4,500,000 ($160-$290 USD). This includes a quality exhaust fan (IDR 1,200,000-2,000,000), rigid PVC ducting and fittings (IDR 400,000-800,000), insulation materials (IDR 300,000-500,000), exterior termination cap (IDR 350,000-600,000), and sealing materials (IDR 250,000-400,000). Premium installations with longer duct runs, multiple bends, or challenging routing can reach IDR 6,000,000-8,000,000 ($385-$515 USD).
Labor and Installation Timeline
Professional installation by experienced Bali villa construction specialists typically requires 1-2 days per bathroom, depending on complexity. Simple wall-termination installations with direct routing complete in 4-6 hours. Complex installations requiring roof penetrations, long duct runs through multiple ceiling cavities, or coordination with existing structural elements may require 2-3 days. Labor costs range from IDR 1,500,000 to IDR 3,500,000 ($95-$225 USD) per installation, reflecting the technical expertise required for proper weatherproofing and system integration.
Long-Term Value Considerations
While proper exhaust fan ducting represents a modest investment during construction or renovation Bali projects, the cost of remediation after mold damage far exceeds prevention expenses. Mold remediation typically costs IDR 15,000,000-35,000,000 ($965-$2,250 USD) per affected bathroom, including mold removal, damaged material replacement, and repainting. Additionally, properly installed systems require minimal maintenance—annual cleaning and inspection costs approximately IDR 300,000-500,000 ($19-$32 USD), compared to ongoing mold treatment expenses for inadequately ventilated bathrooms.
Frequently Asked Questions About Bathroom Exhaust Ducting
Can I vent my bathroom exhaust fan into the attic or ceiling space?
Absolutely not in Bali’s climate. Venting into concealed spaces concentrates moisture in areas with poor air circulation, creating severe mold problems that damage structural timber, insulation, and ceiling materials. This practice violates building best practices and will cause expensive hidden damage. All exhaust ducts must terminate completely outside the building envelope through walls or roof penetrations with proper weatherproofing.
How often should bathroom exhaust fans run in Bali villas?
Exhaust fans should run during all bathroom use and continue for 20-30 minutes after showering to remove residual moisture. Installing humidity-sensing automatic switches eliminates the need for manual operation—these sensors activate the fan when humidity exceeds 60-70% and shut off when levels normalize. For bathrooms without windows, consider running exhaust fans continuously at low speed to maintain air circulation and prevent moisture accumulation between uses.
What size exhaust fan do I need for my Bali villa bathroom?
Calculate bathroom volume (length × width × height in meters) and multiply by 10-12 to determine required airflow in cubic meters per hour (CMH). A 3m × 2.5m × 2.8m bathroom (21 cubic meters) requires 210-252 CMH minimum. Add capacity for duct resistance: 1.7 CMH per meter of duct length and 42 CMH per 90-degree bend. Most Bali bathrooms require fans rated 250-400 CMH for effective moisture control.
Can I use flexible ducting for my bathroom exhaust system?
Flexible ducting should be limited to short connections (maximum 1.5 meters) between the fan housing and rigid ductwork. The corrugated interior of flexible ducts creates significant airflow resistance and provides surface texture where condensation accumulates and mold grows. For main duct runs, always use rigid PVC or metal ducting with smooth interiors that maximize airflow efficiency and resist mold colonization.
How do I prevent rain from entering through the exterior vent?
Install exterior termination caps with integrated backdraft dampers—spring-loaded flaps that open during fan operation and close when the fan is off. Position wall terminations under roof overhangs when possible, and angle them slightly downward to shed water. Use termination caps specifically designed for high-rainfall environments with deep hoods that
 2144 m²11 month(s)from 104.000 USD
Narayana
 3180 m²7 month(s)from 142.000 USD
Vasudeva

Want to calculate?
 3104 m²11 month(s)from 99.000 USD
TALA 100
 164 m²7 month(s)from 79.000 USD
TALA TWO
 1from 198.000 USD
Private: Haridas Villas
 3173 m²6 month(s)from 125.000 USD
TALA FOUR
164 m²7 month(s)from 79.000 USDPrivate: Haridas Villas, Tegallalang
 172 m²8 month(s)from 120.000 USD
Keshava
 3127 m²9 month(s)from 177.000 USD
Mukunda
 3124 m²6 month(s)from 123.000 USD
TALA 8
 4344 m²16 month(s)from 290.000 USD
Radha
Start With Real Numbers, Not Guesses
Before finalizing your finishing works plan, check realistic cost ranges for your Bali villa project.
Available lands
 800 m²10 min$ 307882Bali, Tibubeneng
 2000 m²15 min$ 110837Bali, Karangasem
 7250 m²56 min$ 235714Bali, Tabanan
 3700 m²15 min$ 738177Bali, Tabanan
 2200 m²3 min$ 183842Bali, Berawa
 1000 m²10 min$ 230911Bali, Kerobokan
 1230 m²15 min$ 132543Bali, Tegallalang
 1720 m²2 min$ 241478Bali, Tabanan
 2000 m²5 min$ 738916Bali, Ungasan
 5815 m²5 min$ 815740Bali, Tabanan
 6000 m²30 min$ 55419Bali, Tabanan
 250 m²15 min$ 40025Bali, Munggu
 1158 m²12 min$ 291996Bali, Mengwi
 608 m²15 min$ 310377Bali, Seminyak
 2850 m²15 min$ 315887Bali, Tabanan
Planning a build in Bali?
Get a feasibility view, budget range and timeline from Teville.
Related guides
Resin-Infused Plaster Finishes: Anti-Salt Systems Bali
Expert technical guide: Resin-Infused Plaster Finishes: Anti-Salt Systems Bali
8 min read
Prefinished Timber Joinery: Silicone Seals Fixings Bali
Professional prefinished timber joinery installation in Bali with silicone seals and fixings for durable weatherproof performance and a premium finish.
10 min read
Polished Concrete Microtopping: Surface Prep Sealants Bali
Discover Bali s polished concrete microtopping: expert surface prep, durable sealants, and a flawless finish for modern floors with minimal maintenance.
9 min read