Wet Room Floor Gradient Standards Drainage Slope in Bali
Why Wet Room Floor Gradients Fail in Bali’s Tropical Climate
Standing water in your Bali villa’s wet room isn’t just an aesthetic problem—it’s a structural threat. In Bali’s high-humidity environment with frequent heavy rainfall, improper floor gradients create persistent moisture issues that lead to tile delamination, grout deterioration, and mold growth within months. The difference between a wet room that drains efficiently and one that becomes a maintenance nightmare comes down to precise gradient calculations during the finishing works phase. Most wet room failures in Bali villa construction stem from inadequate slope specifications, incorrect substrate preparation, or poor drain positioning—all preventable through proper technical execution during interior finishing.
Technical Standards for Wet Room Floor Gradients in Tropical Construction
Wet room floor gradient specifications require mathematical precision combined with practical understanding of water behavior in tropical conditions. The international standard for wet room drainage slopes ranges from 1.25% to 2%, translating to a fall of 12mm to 15mm per meter of floor length. However, Bali villa construction demands adjustments to these baseline standards due to unique environmental factors.
In Bali’s tropical climate, the recommended gradient increases to 1.5% to 2.5% (15mm to 25mm per meter) for several technical reasons. Higher humidity levels mean water evaporation rates are significantly slower than in temperate climates. Heavy monsoon rainfall can overwhelm drainage systems if gradients are insufficient. The prevalence of natural stone and textured tile finishes in interior finishing Bali projects creates additional surface friction that impedes water flow, requiring steeper slopes to compensate.
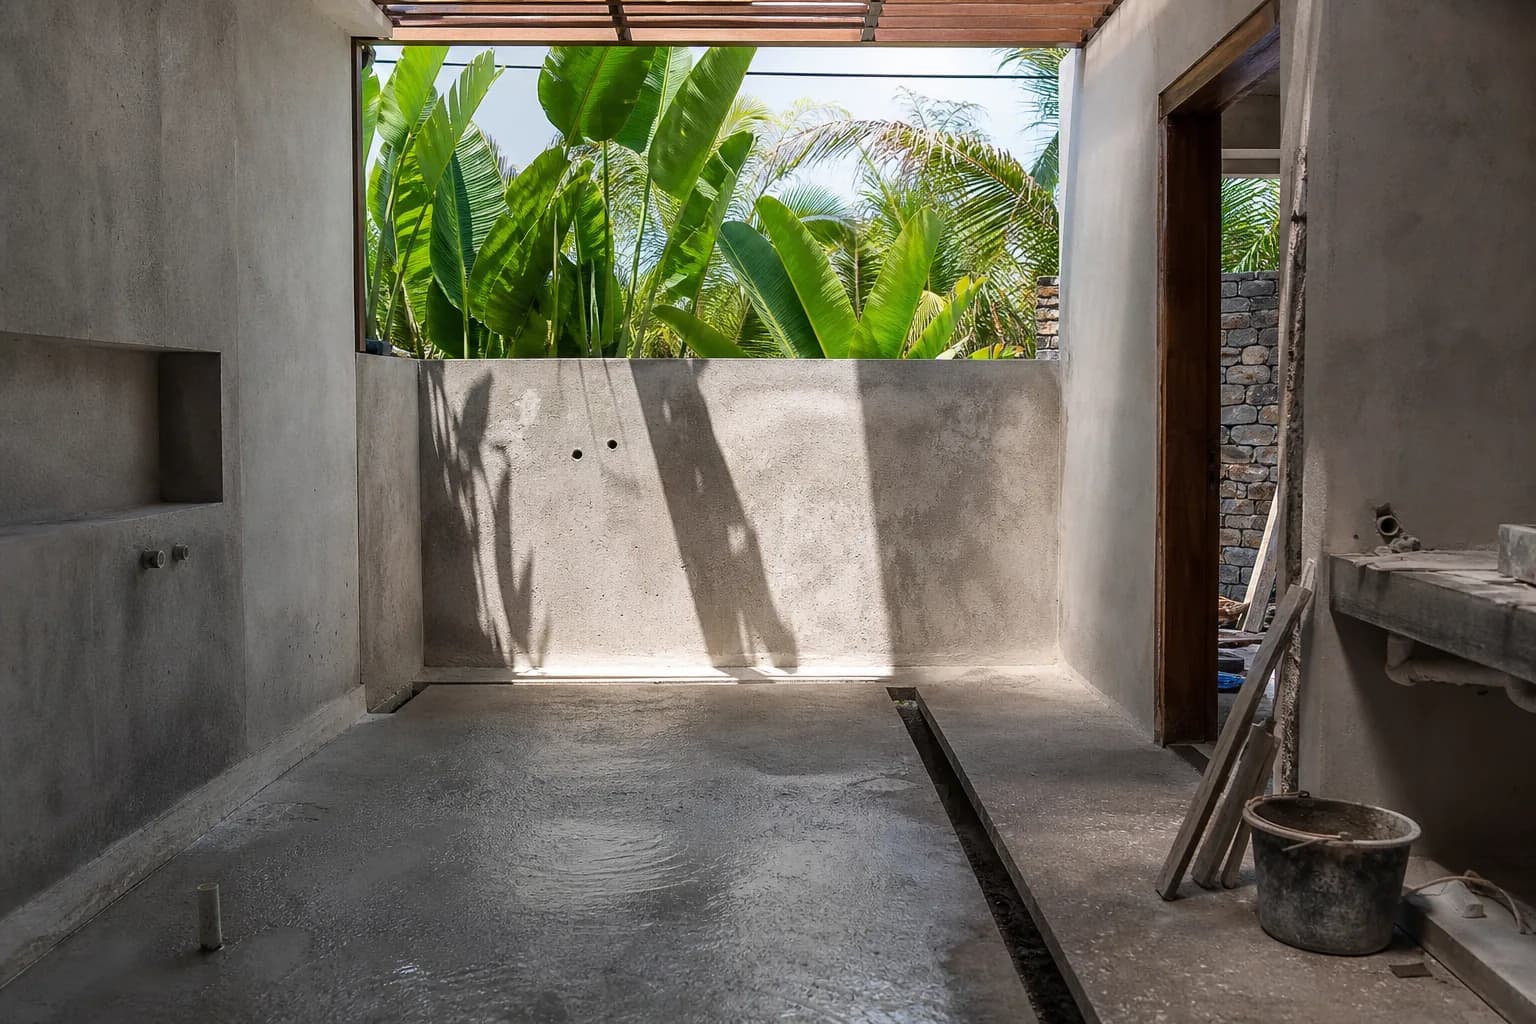
The gradient calculation must account for the entire wet room floor area, not just the immediate drain vicinity. For a standard 2.5m x 3m wet room, this means the furthest corner from the drain should sit 37.5mm to 62.5mm higher than the drain level when using the recommended 1.5% to 2.5% gradient. This elevation difference must be achieved smoothly across the entire floor surface without creating trip hazards or visually obvious slopes.
Drain positioning critically affects gradient effectiveness. Central floor drains require four-way slopes from all walls, creating a subtle pyramid effect. Linear drains along one wall simplify the gradient to a single-plane slope but require precise leveling along the drain’s entire length. Corner drains create two-plane slopes but can result in inadequate drainage in the opposite corner if the room exceeds 3m in either dimension.
The substrate preparation phase determines gradient accuracy. In renovation Bali projects, existing floor levels often constrain gradient options. The structural slab must provide sufficient depth for the waterproofing membrane, adhesive bed, tile thickness, and the gradient itself—typically requiring 80mm to 120mm total build-up from the drain level. When renovating existing wet rooms, this often necessitates lowering the drain connection or raising door thresholds, both requiring careful coordination with villa utilities systems.
Gradient consistency matters as much as the slope percentage. Undulations, dips, or reverse slopes create water pooling zones that defeat the drainage system. Professional installation requires laser level verification at multiple points during the screed application process. The screed itself must maintain workability long enough to achieve the precise gradient while being firm enough to resist sagging before curing—a particular challenge in Bali’s heat and humidity.
Waterproofing membrane application must accommodate the gradient without creating wrinkles or voids. Liquid-applied membranes conform naturally to sloped surfaces, while sheet membranes require careful cutting and overlapping to follow the gradient smoothly. The membrane must extend at least 150mm up all walls in wet rooms, creating a continuous waterproof basin that directs all water toward the drain regardless of surface water flow patterns.
Materials and Standards for Bali Wet Room Construction
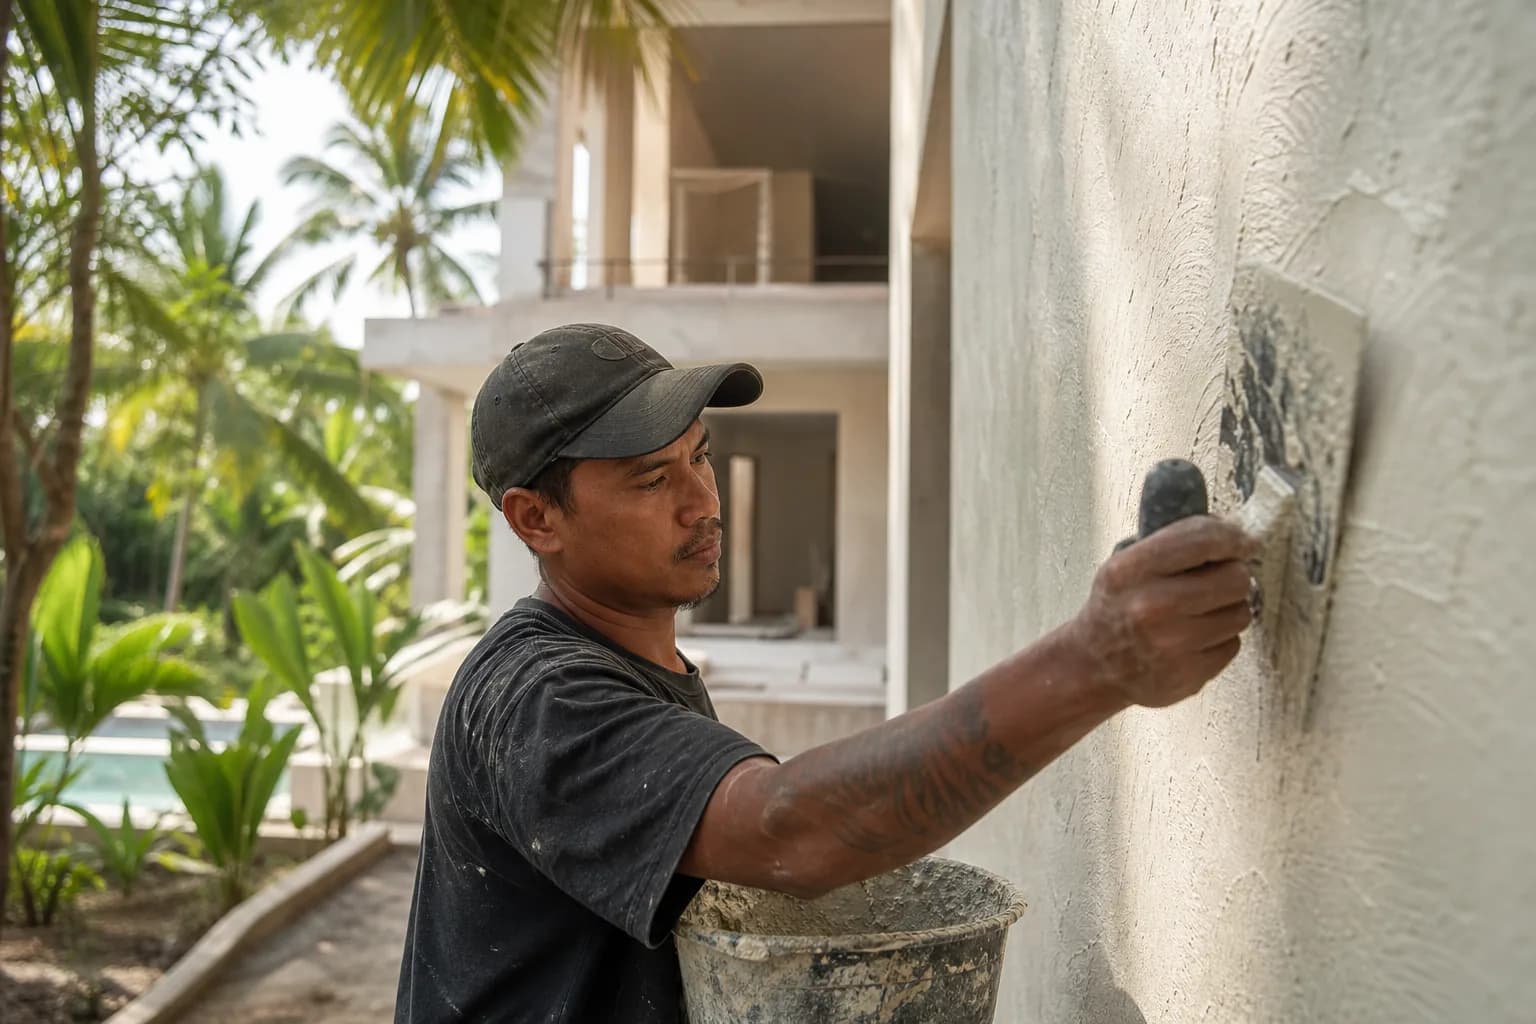
Material selection for wet room floor gradients directly impacts long-term drainage performance. The substrate layer typically consists of fiber-reinforced cement screed or specialized gradient-forming compounds. Standard cement-sand screeds work for gradients but require expert troweling to achieve consistent slopes. Pre-mixed gradient screeds contain polymers that improve workability and reduce shrinkage cracking—critical for maintaining precise slopes in Bali’s temperature fluctuations.
Waterproofing membranes must meet AS 3740 or equivalent standards for wet area waterproofing. Two-part polyurethane membranes offer excellent flexibility and crack-bridging properties essential for accommodating substrate movement in tropical conditions. Cementitious waterproofing membranes provide good adhesion for tile installation but require reinforcement fabric at gradient transitions and around drain penetrations.
Tile selection affects drainage efficiency significantly. Large-format tiles (600mm x 600mm or larger) minimize grout joints but require perfectly flat substrate preparation to prevent lippage that impedes water flow. Smaller tiles (300mm x 300mm) better accommodate gradients and provide more grout joints for water channeling, but increase installation complexity. Textured or natural stone tiles must have slip ratings suitable for wet areas (R11 or higher) while maintaining surface profiles that don’t trap water.
Drain systems for Bali villa construction must handle high water volumes during monsoon periods. Minimum drain diameter of 50mm is standard, with 75mm preferred for larger wet rooms. Stainless steel drain grates resist corrosion in tropical humidity better than chrome-plated brass. Adjustable drain flanges allow fine-tuning of the finished floor level during installation, critical for achieving exact gradient specifications.
Step-by-Step Wet Room Gradient Installation Process
The wet room floor gradient installation process begins long before any finishing materials appear on site. During the structural phase, the plumbing rough-in must position the drain outlet at the correct depth to accommodate the planned floor build-up plus the gradient fall. For a 3m wet room with 2% gradient, the drain must sit 60mm below the finished floor level at the highest point, plus the thickness of tile, adhesive, and screed layers.
Step 1: Substrate Preparation and Leveling
Clean the structural slab thoroughly, removing all debris, dust, and contaminants. Apply a bonding primer suitable for the substrate type—concrete slabs require different primers than cement board overlays. Install the drain body, ensuring the flange sits at the calculated depth below the planned finished floor level. Verify the drain outlet slopes correctly toward the main drainage system with minimum 1% fall in the waste pipe itself.
Step 2: Gradient Screed Application
Establish reference points using laser levels at all corners and midpoints of the wet room. Calculate the exact height at each point based on the chosen gradient percentage and distance from the drain. Mix gradient screed according to manufacturer specifications—water content critically affects workability and final strength. Apply screed in sections, using straight edges and spirit levels to verify slopes continuously. Create smooth transitions between different slope planes, avoiding ridges or valleys. Allow proper curing time (typically 24-48 hours in Bali’s climate) before proceeding.
Step 3: Waterproofing Membrane Installation
This phase is critical for interior finishing Bali projects. Apply primer to the cured screed surface. For liquid membranes, apply the first coat at recommended thickness (typically 1mm), extending 150mm up all walls. Embed reinforcement fabric at all corners, wall-floor junctions, and around the drain penetration while the first coat is still wet. Apply second and third coats after appropriate drying intervals, building to minimum 2mm total thickness. For sheet membranes, cut pieces to accommodate the gradient, overlapping seams by minimum 100mm and heat-welding or adhesive-bonding according to system requirements.
Step 4: Drain Integration and Testing
Install the drain flange bonding collar, integrating it with the waterproofing membrane system. This connection point is the most common failure location in wet rooms. Apply membrane material over the drain flange, then cut out the center opening. Secure the drain grate assembly, ensuring it sits flush with or slightly below the planned finished tile surface. Conduct a flood test by blocking the drain and filling the wet room to 50mm depth for 24 hours, checking for any water loss or leakage.
Step 5: Tile Installation and Final Gradient Verification
Select appropriate tile adhesive for wet areas—flexible, polymer-modified adhesives accommodate substrate movement better than standard cement-based products. Begin tile installation from the drain outward, maintaining the established gradient. Use spacers consistently and check levels frequently. Ensure tiles slope toward the drain without creating lips or edges that trap water. Pay special attention to the tiles immediately surrounding the drain—these require precise cutting and placement. After adhesive curing, apply epoxy or high-quality cement grout, tooling joints to be slightly concave to encourage water flow. Seal all grout joints with penetrating sealer suitable for tropical humidity.
Costs and Timeline for Wet Room Gradient Installation
Wet room floor gradient installation costs in Bali vary significantly based on room size, material specifications, and existing conditions. For a standard 2.5m x 3m wet room in new Bali villa construction, expect material costs of IDR 2,500,000 to IDR 4,500,000 including gradient screed, waterproofing membrane, tile adhesive, mid-range tiles, and drain assembly. Premium natural stone tiles or designer drain systems can increase material costs to IDR 8,000,000 or more.
Professional installation labor for proper gradient execution typically costs IDR 3,000,000 to IDR 5,500,000 for the complete process from substrate preparation through final tile installation. This assumes straightforward installation conditions. Renovation Bali projects involving removal of existing finishes, drain repositioning, or structural modifications add IDR 2,000,000 to IDR 4,000,000 to the total project cost.
Timeline for proper wet room gradient installation spans 7 to 12 working days under normal conditions. Day 1-2 covers substrate preparation and drain installation. Day 3-4 involves gradient screed application and curing. Day 5-6 addresses waterproofing membrane installation with required drying intervals between coats. Day 7 includes flood testing. Days 8-10 cover tile installation. Days 11-12 involve grouting, sealing, and final cleanup. Bali’s rainy season can extend timelines by 20-30% due to humidity affecting curing times and material workability.
For detailed cost estimation specific to your project requirements, Teville provides comprehensive assessment services through our cost estimation process, accounting for site-specific conditions and material preferences that affect wet room gradient installation complexity.
Frequently Asked Questions About Wet Room Floor Gradients
What gradient percentage should I specify for my Bali villa wet room?
For Bali’s tropical climate, specify a gradient between 1.5% and 2.5% (15mm to 25mm fall per meter). This exceeds international minimums of 1.25% because Bali’s high humidity slows evaporation and heavy rainfall requires faster drainage. Larger wet rooms (over 3m in any dimension) should use the steeper 2.5% gradient to ensure water from distant corners reaches the drain efficiently. Consult with experienced interior finishing Bali specialists to determine the optimal gradient for your specific room dimensions and tile selections.
Can I retrofit proper gradients in an existing wet room with drainage problems?
Yes, but renovation Bali projects involving gradient correction require complete removal of existing tiles and often the underlying screed. The process involves assessing the current drain position, calculating the required gradient, and determining if sufficient depth exists for new floor build-up. In some cases, the drain must be lowered or door thresholds raised. Expect renovation costs 40-60% higher than new construction due to demolition, disposal, and potential complications from existing waterproofing or structural conditions. Teville’s renovation specialists can assess your specific situation and recommend the most cost-effective approach.
How do I prevent water pooling in the corners opposite the drain?
Corner pooling occurs when gradients are insufficient or inconsistently applied. The solution involves ensuring the gradient extends uniformly across the entire floor surface, not just near the drain. For rooms larger than 3m, consider dual drains or linear drain systems that reduce the maximum distance water must travel. During installation, verify gradient accuracy at multiple points using laser levels, paying special attention to corners. Tile selection also matters—avoid tiles with pronounced texture or deep grout joints in areas furthest from drains, as these impede water flow more than smooth surfaces.
What’s the difference between linear drains and center point drains for gradient requirements?
Linear drains simplify gradient installation by requiring only a single-plane slope toward one wall, making them ideal for rectangular wet rooms and easier to tile without creating complex slope transitions. Center point drains require four-way slopes from all walls, creating more complex installation but offering flexibility in room layout and door positioning. For Bali villa construction, linear drains work particularly well in narrow wet rooms (under 1.5m wide) while center drains suit square or irregularly shaped spaces. Linear drains typically cost 30-50% more than standard center drains but can reduce installation labor costs by 15-20%.
How long before I can use a newly installed wet room with proper gradients?
Full curing requires patience
 3173 m²6 month(s)from 125.000 USD
TALA FOUR
 3180 m²7 month(s)from 142.000 USD
Vasudeva
 3124 m²6 month(s)from 123.000 USD
TALA 8
 3127 m²9 month(s)from 177.000 USD
Mukunda
 164 m²7 month(s)from 79.000 USD
Private: Haridas Villas, Tegallalang
164 m²7 month(s)from 79.000 USDTALA TWO
 3104 m²11 month(s)from 99.000 USD
TALA 100
 4344 m²16 month(s)from 290.000 USD
Radha

Want to calculate?
 172 m²8 month(s)from 120.000 USD
Keshava
 2144 m²11 month(s)from 104.000 USD
Narayana
 1from 198.000 USD
Private: Haridas Villas
Start With Real Numbers, Not Guesses
Before finalizing your finishing works plan, check realistic cost ranges for your Bali villa project.
Available lands
 1720 m²2 min$ 241478Bali, Tabanan
 8313 m²15 min$ 716670Bali, Buduk
 7500 m²5 min$ 206281Bali, Kedungu
 2130 m²10 min$ 495776Bali, Pecatu
 1300 m²10 min$ 312192Bali, Kutuh South Bali
 600 m²12 min$ 101970Bali, Mengwi
 5028 m²10 min$ 361000Bali, Ubud
 2200 m²15 min$ 508005Bali, Canggu
 325 m²15 min$ 44472Bali, Ungasan
 300 m²55 min$ 32475Bali, Tegelalang
 3100 m²15 min$ 257697Bali, Tegallalang
 2000 m²5 min$ 1440887Bali, Pecatu
 700 m²15 min$ 109052Bali, Buduk
 1375 m²10 min$ 447044Bali, Canggu
 550 m²15 min$ 164594Bali, Mengwi
Planning a build in Bali?
Get a feasibility view, budget range and timeline from Teville.
Related guides
Resin-Infused Plaster Finishes: Anti-Salt Systems Bali
Expert technical guide: Resin-Infused Plaster Finishes: Anti-Salt Systems Bali
8 min read
Prefinished Timber Joinery: Silicone Seals Fixings Bali
Professional prefinished timber joinery installation in Bali with silicone seals and fixings for durable weatherproof performance and a premium finish.
10 min read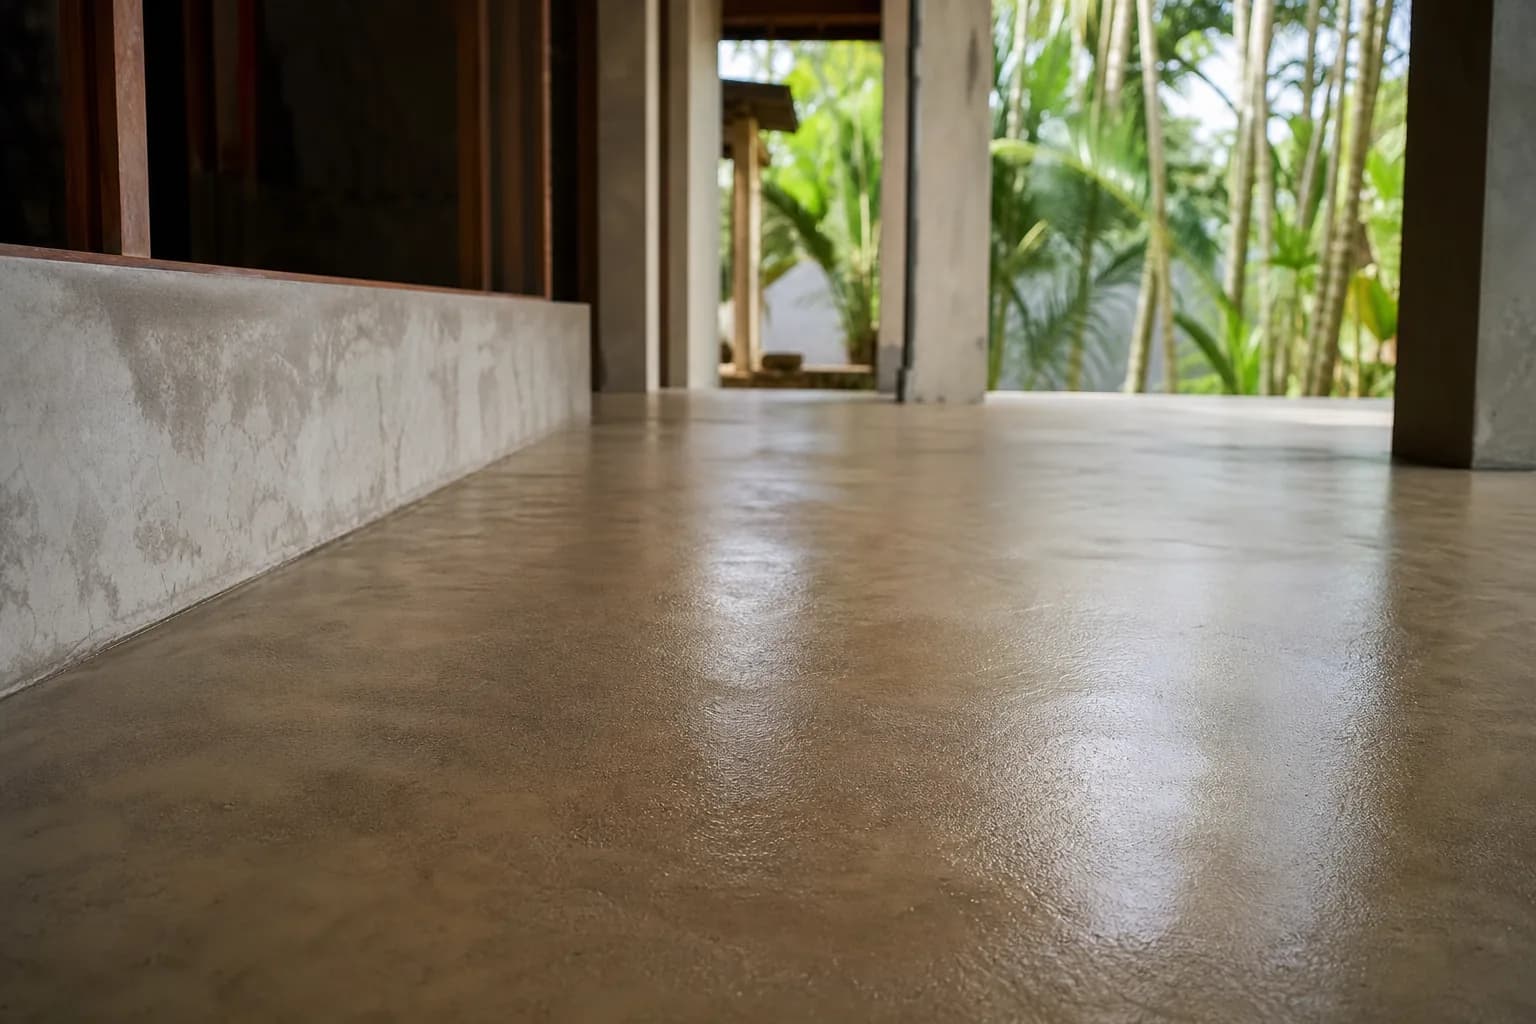
Polished Concrete Microtopping: Surface Prep Sealants Bali
Discover Bali s polished concrete microtopping: expert surface prep, durable sealants, and a flawless finish for modern floors with minimal maintenance.
9 min read