Venetian Plaster vs Acrylic Render: Bali Villa Finishes

# Venetian Plaster vs Acrylic Render: Bali Villa Wall Finishes
The Critical Wall Finish Decision for Bali Villa Renovations
When renovating or constructing a luxury villa in Bali, property owners face a pivotal decision that dramatically impacts both aesthetic appeal and long-term durability: choosing between Venetian plaster and acrylic render for wall finishes. This choice isn’t merely cosmetic—it determines maintenance cycles, climate resilience, and the overall character of your interior finishing Bali project. Venetian plaster offers that coveted marble-like elegance for feature walls, while acrylic render provides robust protection against Bali’s intense tropical conditions. Understanding the technical distinctions, application processes, and performance characteristics of each finish is essential for making an informed decision that aligns with your villa’s architectural vision and functional requirements in Bali’s unique climate.
Technical Characteristics: Understanding Two Distinct Finishing Systems
Venetian plaster and acrylic render represent fundamentally different approaches to wall finishing, each engineered for specific applications within Bali villa construction projects. The technical understanding of these materials is crucial for proper specification and installation.
Venetian Plaster Composition and Properties
Venetian plaster is a lime-based finishing system composed of slaked lime (calcium hydroxide) combined with finely ground marble dust, quartz particles, or kaolin clay. This traditional material creates a translucent, multi-dimensional surface through the application of multiple thin layers—typically three to seven coats—each burnished with specialized trowels to achieve varying levels of sheen. The lime content provides natural breathability, allowing moisture vapor to pass through the wall assembly, which is particularly valuable in Bali’s humid climate where trapped moisture can lead to mold growth and structural deterioration.
The material cures through carbonation, a chemical process where calcium hydroxide reacts with atmospheric carbon dioxide to form calcium carbonate, essentially turning back into limestone over several weeks. This curing process creates an increasingly hard, durable surface that actually strengthens over time. The thickness of a complete Venetian plaster application typically ranges from 1.5mm to 3mm across all layers, making it suitable for interior walls where substrate preparation is critical.
Acrylic Render System Architecture
Acrylic render is a polymer-modified cementitious coating system that combines acrylic resins with cement, fine aggregates, and various additives to create a flexible, weather-resistant exterior finish. The acrylic component provides elasticity that accommodates substrate movement and thermal expansion—essential characteristics for renovation Bali projects where existing structures may experience settlement or temperature-induced dimensional changes.
Modern acrylic render systems are typically applied in two coats: a base coat of 6-10mm thickness that provides impact resistance and substrate leveling, followed by a finish coat of 1.5-3mm that delivers the final texture and color. The material achieves initial set within hours and reaches handling strength within 24-48 hours, though full cure requires 7-14 days depending on ambient conditions. The polymer content creates a micro-porous structure that sheds liquid water while allowing vapor transmission, providing weather protection without trapping moisture within the wall assembly.
Performance in Bali’s Tropical Climate
Bali’s climate presents specific challenges: high humidity (70-95%), intense UV radiation, salt-laden coastal air, and dramatic temperature fluctuations between air-conditioned interiors and tropical exteriors. Venetian plaster excels in controlled interior environments where its breathability prevents moisture accumulation behind the finish. However, it requires protection from direct water exposure and is generally unsuitable for exterior applications in tropical climates without additional sealers that compromise its natural breathability.
Acrylic render is specifically engineered for exterior exposure, with UV-stable pigments, water-shedding properties, and flexibility that prevents cracking from thermal movement. In coastal Bali locations, acrylic render’s resistance to salt penetration and its ability to be cleaned without surface degradation make it the preferred choice for external walls. The material’s quick curing time also reduces weather-related installation delays during Bali’s rainy season.
Material Standards and Quality Specifications for Bali Applications
Proper material selection and quality control are fundamental to achieving durable, aesthetically pleasing wall finishes in Bali villa construction projects. Both Venetian plaster and acrylic render require specific standards to perform optimally in tropical conditions.
Venetian Plaster Material Requirements
Premium Venetian plaster systems for interior finishing Bali projects should utilize natural hydraulic lime (NHL 3.5 or NHL 5) rather than non-hydraulic lime, as hydraulic lime provides superior moisture resistance—critical in Bali’s humid environment. The marble aggregate should be graded between 100-400 microns for the base coats and 50-150 microns for finish coats to achieve proper workability and the characteristic polished appearance. Quality systems include natural or synthetic pigments that are UV-stable and alkali-resistant to prevent color fading or discoloration.
Substrate preparation materials must include appropriate primers that regulate suction and ensure proper adhesion. For concrete substrates common in Bali construction, a bonding agent or specialized primer is essential to prevent delamination. The finishing wax or soap used for final polishing should be breathable and specifically formulated for lime-based systems to maintain the material’s vapor permeability.
Acrylic Render System Standards
Acrylic render systems for Bali applications should meet or exceed AS/NZS 4548 standards for polymer-modified renders, with specific attention to flexibility, water resistance, and adhesion properties. The base coat should contain a minimum 10% acrylic polymer content by weight to ensure adequate flexibility and water resistance. Fiber reinforcement—typically alkali-resistant glass fiber mesh with a minimum weight of 145g/m²—is essential for crack prevention and impact resistance.
For coastal Bali locations within 1km of the ocean, specify acrylic renders with enhanced salt resistance and consider systems with integrated biocides to prevent algae and mold growth on exterior surfaces. The finish coat should incorporate UV-stable pigments with a minimum lightfastness rating of 7 (on a scale of 8) to prevent color fading under Bali’s intense tropical sun. All components should be from a single manufacturer system to ensure compatibility and warranty coverage.
Step-by-Step Application Process: From Substrate to Finished Surface
The application methodology for both Venetian plaster and acrylic render requires precise technique and environmental control to achieve optimal results in renovation Bali projects. Understanding these processes helps property owners appreciate the craftsmanship involved and set realistic expectations.
Venetian Plaster Installation Sequence
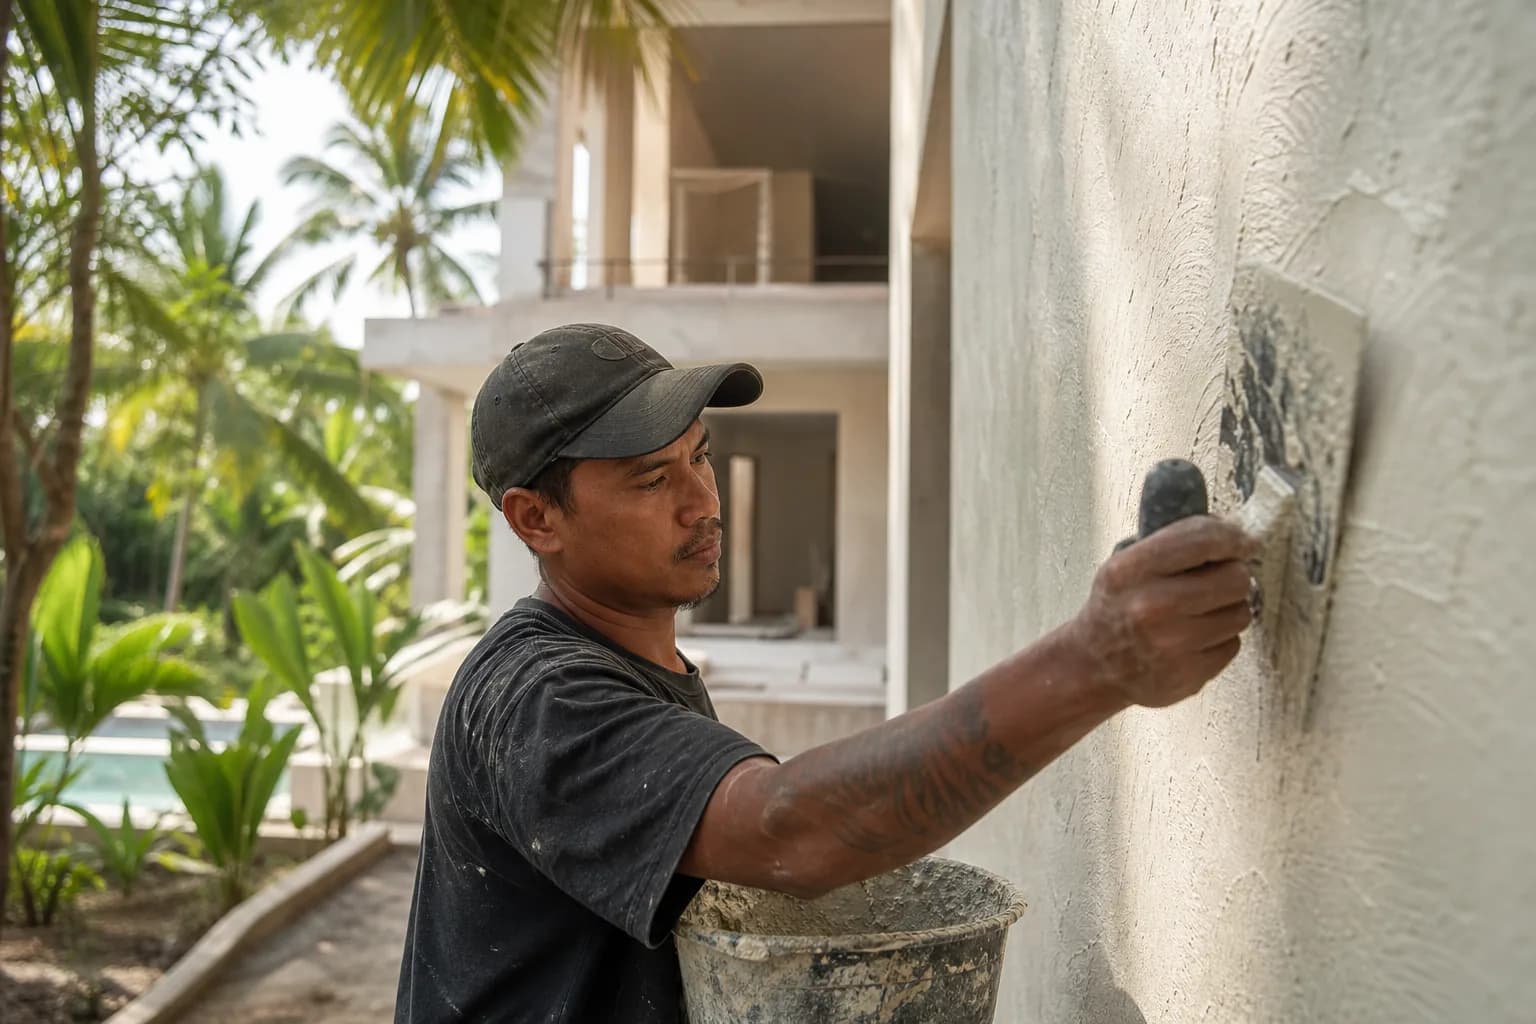
Step 1: Substrate Preparation (Day 1) – The existing wall surface must be structurally sound, clean, and properly cured. For new concrete or cement render substrates, allow minimum 28 days curing time. Remove all loose material, dust, and contaminants. Fill significant imperfections with appropriate patching compound and allow to cure. The surface should be flat within 3mm over 2 meters. Apply a specialized primer designed for Venetian plaster systems, which regulates substrate suction and improves adhesion. In Bali’s climate, ensure the room is climate-controlled with humidity below 70% and temperature between 18-25°C for optimal application conditions.
Step 2: Base Coat Application (Day 2) – Apply the first coat of Venetian plaster using a stainless steel trowel held at approximately 15-30 degrees to the wall surface. This coat should be 0.5-1mm thick and applied in random, overlapping strokes to create an irregular pattern that will be visible in the final finish. The goal is complete coverage without excessive buildup. Allow this coat to dry for 4-6 hours in controlled conditions. The surface should be firm to touch but not fully cured before proceeding.
Step 3: Second Coat and Initial Burnishing (Day 3) – Apply the second coat in a similar thickness, working in sections of approximately 1-2 square meters. While the material is still workable (typically 20-40 minutes after application), begin the first burnishing pass using firm pressure with a clean trowel held nearly flat against the surface. This compresses the material and begins developing the characteristic sheen. Allow 6-8 hours drying time.
Step 4: Final Coat and Polishing (Day 4-5) – Apply the final coat very thinly (0.3-0.5mm) in small sections. As each section becomes leather-hard, perform intensive burnishing using a clean, polished trowel with significant pressure. This process, called “stucco lucido,” compresses the lime and marble particles to create the polished, marble-like appearance. Multiple burnishing passes may be required, with the trowel becoming increasingly flat against the surface. For high-gloss finishes, apply a specialized Venetian plaster soap or wax and buff to final sheen after 24 hours.
Acrylic Render Application Methodology
Step 1: Surface Assessment and Preparation (Day 1) – Evaluate the existing substrate for structural integrity, checking for loose material, cracks, or moisture issues. For renovation Bali projects involving existing rendered surfaces, perform a tap test to identify hollow areas that require removal and repair. Clean the surface thoroughly using pressure washing (maximum 2000 PSI) and allow to dry completely—typically 24-48 hours in Bali’s climate. Apply a bonding primer or base coat primer according to manufacturer specifications, ensuring complete coverage.
Step 2: Mesh Installation and Base Coat (Day 2-3) – Apply the acrylic render base coat to approximately 6-8mm thickness using a stainless steel trowel. While the base coat is still wet, embed alkali-resistant glass fiber mesh into the surface, overlapping joints by minimum 100mm. Apply additional base coat over the mesh to fully encapsulate it, bringing total thickness to 8-10mm. Use a straightedge to check for flatness and fill any low areas. The base coat provides the structural foundation and impact resistance for the system. Allow 24-48 hours curing time, protecting from direct sun and rain.
Step 3: Finish Coat Application (Day 4-5) – Once the base coat has achieved sufficient strength (firm to touch, no longer tacky), apply the finish coat to 1.5-3mm thickness. The application technique depends on the desired texture: smooth finishes require careful troweling with minimal texture, while textured finishes may use specialized trowels, sponges, or spray application. Work in manageable sections with wet edges to avoid visible joints. In Bali’s climate, avoid application during peak heat (11am-3pm) to prevent too-rapid drying that can cause surface crazing.
Step 4: Curing and Protection (Day 6-14) – Protect the newly applied render from direct sun, rain, and mechanical damage during the critical curing period. In Bali’s intense sun, consider light misting with water during the first 2-3 days to prevent too-rapid moisture loss. Full cure requires 7-14 days depending on ambient conditions, after which the surface can be cleaned and is ready for normal exposure.
Cost Analysis and Project Timeline for Bali Villa Applications
Understanding the financial and temporal investment required for each finishing system helps property owners make informed decisions for their Bali villa construction or renovation projects.
Venetian Plaster Investment
Venetian plaster represents a premium interior finishing Bali option with material costs ranging from IDR 350,000 to IDR 750,000 per square meter, depending on the number of coats, finish complexity, and material quality. Labor costs are substantial due to the specialized skill required, typically adding IDR 400,000 to IDR 900,000 per square meter. A complete Venetian plaster installation for a feature wall (15-20 square meters) generally ranges from IDR 15,000,000 to IDR 35,000,000 including materials, labor, and substrate preparation. Timeline for a typical feature wall spans 5-7 working days, with an additional 2-3 weeks for full cure before furniture installation or final room completion.
Acrylic Render Economics
Acrylic render systems are more economical for larger exterior applications, with material costs of IDR 150,000 to IDR 300,000 per square meter for quality systems. Professional installation labor adds IDR 200,000 to IDR 400,000 per square meter. For a typical villa exterior (150-200 square meters), expect total costs between IDR 55,000,000 and IDR 140,000,000. The timeline for exterior rendering spans 10-14 working days for a complete villa, weather dependent. The faster installation and curing time compared to traditional cement render can reduce overall project duration by 1-2 weeks.
For detailed cost estimation specific to your project, Teville provides comprehensive assessment through our cost estimation service, evaluating your specific requirements, site conditions, and finish preferences.
Frequently Asked Questions: Venetian Plaster vs Acrylic Render in Bali
Can Venetian plaster be used in Bali bathrooms or wet areas?
Venetian plaster can be used in bathrooms with proper specification and sealing. The material must be sealed with a specialized water-resistant sealer or wax that maintains some breathability while preventing direct water penetration. However, it should not be applied in shower enclosures or areas with direct, continuous water exposure. For wet areas in Bali villa construction, consider using tadelakt (a Moroccan lime plaster variant) or reserve Venetian plaster for powder rooms and areas away fro
 164 m²7 month(s)from 79.000 USD
TALA TWO
 3127 m²9 month(s)from 177.000 USD
Mukunda
 1from 198.000 USD
Private: Haridas Villas
 2144 m²11 month(s)from 104.000 USD
Narayana
 3173 m²6 month(s)from 125.000 USD
TALA FOUR

Want to calculate?
 172 m²8 month(s)from 120.000 USD
Keshava
 3124 m²6 month(s)from 123.000 USD
TALA 8
 3104 m²11 month(s)from 99.000 USD
TALA 100
164 m²7 month(s)from 79.000 USDPrivate: Haridas Villas, Tegallalang
 4344 m²16 month(s)from 290.000 USD
Radha
 3180 m²7 month(s)from 142.000 USD
Vasudeva
Start With Real Numbers, Not Guesses
Before finalizing your finishing works plan, check realistic cost ranges for your Bali villa project.
Available lands
 2000 m²15 min$ 523000Bali, Canggu
 1230 m²15 min$ 132543Bali, Tegallalang
 6000 m²30 min$ 55419Bali, Tabanan
 800 m²8 min$ 113300Bali, Ungasan
 1700 m²10 min$ 632257Bali, Kuta
 500 m²10 min$ 107143Bali, Tabanan
 2500 m²5 min$ 609606Bali, Kedungu
 1000 m²10 min$ 303571Bali, Tabanan
 1533 m²5 min$ 165666Bali, Cepaka
 2130 m²10 min$ 495776Bali, Pecatu
 1000 m²10 min$ 384852Bali, Canggu
 680 m²15 min$ 110751Bali, Pererenan
 10000 m²19 min$ 232759Bali, Buleleng
 18900 m²2 min$ 6912931Bali, Pecatu
 2700 m²30 min$ 314224Bali, Sidemen
Planning a build in Bali?
Get a feasibility view, budget range and timeline from Teville.
Related guides
Resin-Infused Plaster Finishes: Anti-Salt Systems Bali
Expert technical guide: Resin-Infused Plaster Finishes: Anti-Salt Systems Bali
8 min read
Prefinished Timber Joinery: Silicone Seals Fixings Bali
Professional prefinished timber joinery installation in Bali with silicone seals and fixings for durable weatherproof performance and a premium finish.
10 min read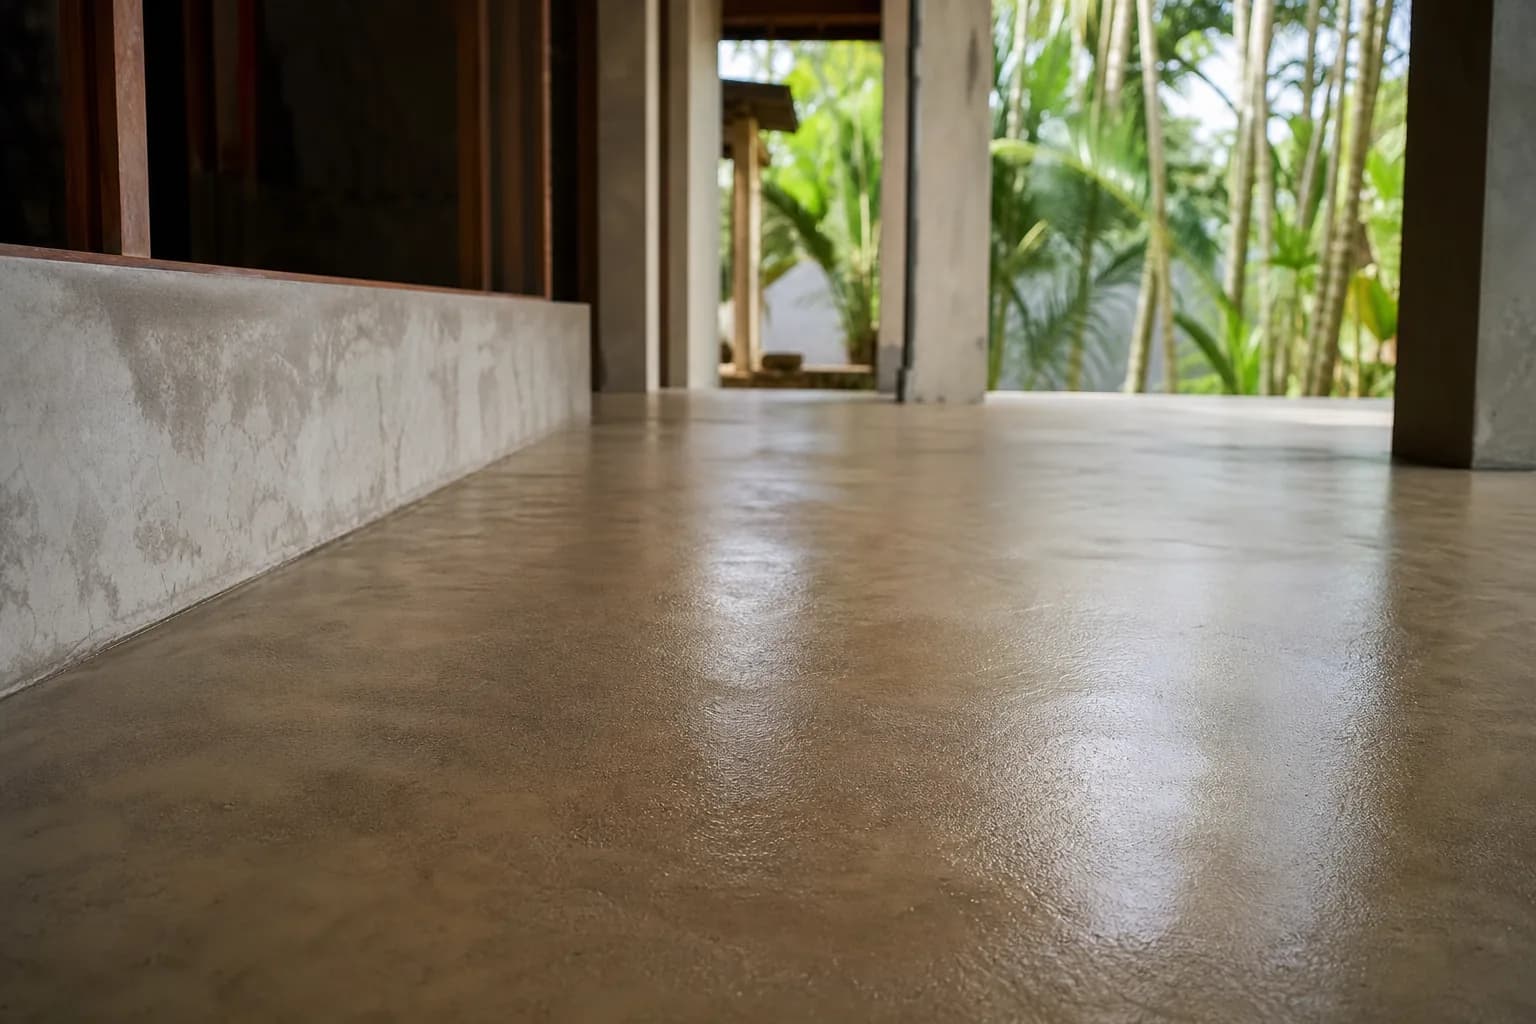
Polished Concrete Microtopping: Surface Prep Sealants Bali
Discover Bali s polished concrete microtopping: expert surface prep, durable sealants, and a flawless finish for modern floors with minimal maintenance.
9 min read