Sealed Epoxy Flooring: Prep Install in Bali Wet Areas
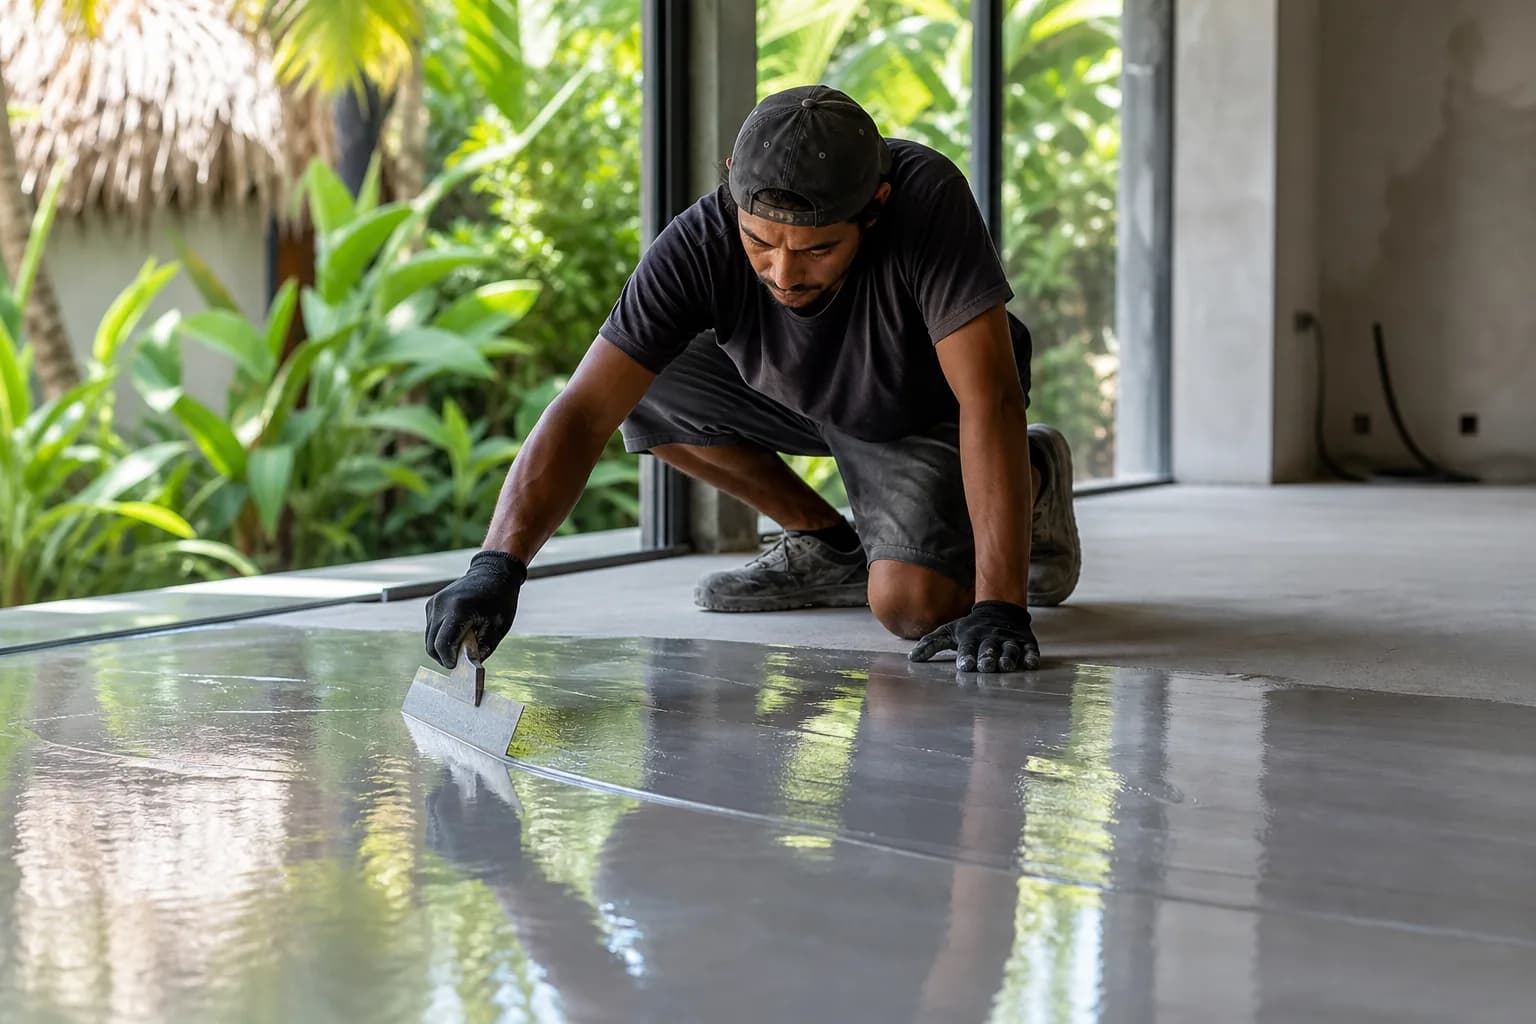
Sealed Epoxy Flooring Prep & Installation for Bali Wet Areas
Specific Problem/Question
In Bali’s tropical climate—high humidity, heavy rain, salt-laden air, and warm temperatures—wet rooms and splash zones are unforgiving on finishes. How do you prep and install a sealed epoxy flooring system that won’t blister, delaminate, go slippery, or stain in bathrooms, spas, pool surrounds, BOH kitchens, and laundries? This Bali area guide explains the technical sequence Teville uses to achieve durable, waterproofed, non-slip epoxy floors that integrate with drains, movement joints, and existing utilities—tailored to renovation Bali conditions and new Bali villa construction.
Technical Deep Dive: What Makes Wet-Area Epoxy Work in Bali
Wet-area epoxy success begins with the substrate. Concrete and cement-sand screeds in Bali often contain residual moisture due to high ambient RH and rapid weather shifts. If vapor drive is not managed, hydrostatic pressure can force blisters in otherwise perfect epoxy. We verify moisture via in-situ RH testing (ASTM F2170) and/or MVER testing (ASTM F1869) and inspect for soluble salts, laitance, and curing compound residue. Salt contamination is common near the coast; we remove it with mechanical prep and controlled water cleaning followed by thorough drying.
Surface profile is targeted per ICRI CSP 2–3 for thin-film systems and CSP 3–5 for broadcast epoxies; we do not rely on acid etching in Bali because rinsing and neutralization are unreliable in humid conditions. Mechanical preparation (planetary grinding, shot-blasting) plus HEPA extraction removes weak layers and opens the pore structure for primer wetting.
Moisture and dew point control are pivotal. We ensure slab temperature remains at least 3°C above dew point during application to avoid amine blush, which can inhibit intercoat adhesion. Where RH is high or the slab is green, we specify a moisture-tolerant epoxy primer or a vapor-mitigation epoxy (high-build, 100% solids) as the first coat to seal residual moisture. For chronic vapor issues, we recommend a dedicated moisture-barrier epoxy system and, when necessary, substrate remediation such as underslab drainage review.
Drainage geometry is non-negotiable. Wet areas require a minimum slope of 1–2% to floor wastes, with stainless steel drains (grade 316 for coastal exposure) mechanically fixed and feathered with epoxy mortar. We frequently install a 75–100 mm epoxy cove base to remove the floor-to-wall seam, improve cleanability, and seal the splash zone—crucial for kitchens and spa rooms.
Crack treatment separates cosmetic from structural movement. Static cracks are routed and filled with low-viscosity epoxy, then sealed with epoxy paste. Moving cracks and control joints are honored through the topping and sealed with a flexible polyurethane joint sealant after topcoating. Bridging joints with rigid epoxy is a common failure point in wet rooms—especially under thermal and moisture cycling in Bali.
Slip resistance must be quantified, not guessed. We specify aggregate loading to meet wet pendulum classifications (e.g., AS 4586: P4–P5 for showers, pool edges, commercial kitchens), using washed quartz or aluminum-oxide in the build or topcoat. For barefoot comfort (spas, bathrooms), we tune texture with rounded quartz and clear topcoats; for BOH kitchens and laundries, a heavier broadcast increases traction and durability.
Chemical and UV exposure informs resin selection. Indoor wet areas perform well with high-build 100% solids epoxy builds and a clear or pigmented aliphatic polyurethane or polyaspartic topcoat. For semi-exposed pool decks or open-air bathrooms, we avoid relying on epoxy as the wearing surface outdoors—epoxy can chalk under UV—so a UV-stable aliphatic topcoat is mandatory. Where acids and disinfectants are frequent (wellness, F&B), novolac epoxy or chemical-resistant topcoats are considered.
Integration with villa utilities is planned early. We coordinate with MEP for drain heights, cleanouts, floor-mounted fixtures, and thresholds to ensure the epoxy buildup and cove base clearances are respected. Penetrations are banded with flexible details and sealed to prevent capillary ingress. We also sequence furniture installation and joinery after cure, with breathable protection layers to avoid imprinting or moisture trapping.
Finally, curing dynamics in Bali: warm temperatures can shorten pot life yet slow full crosslinking in high humidity. We select batch sizes accordingly, use mechanical mixing to minimize entrained air, apply with notched squeegee and back-roll uniformly, and spike-roll broadcasts to release bubbles. If amine blush occurs, we wash and abrade before recoating. A typical cure window is 24–72 hours per manufacturer guidance; no water exposure during this period.
Materials & Standards We Rely On
- Primers: 100% solids, moisture-tolerant epoxy primer or vapor-mitigation epoxy for high RH slabs.
- Repair Compounds: Low-viscosity injection epoxy, epoxy paste for static cracks; semi-rigid polyurea for control joints; epoxy mortar for ramps, slopes, and coves.
- Build Coats: Pigmented 100% solids epoxy (self-leveling or roller-applied) matched to design thickness and traffic class.
- Aggregates: Washed quartz (0.3–0.8 mm) or aluminum oxide for non-slip; decorative vinyl flakes optional for visual and traction.
- Topcoats: Aliphatic polyurethane or polyaspartic (UV-stable, chemical-resistant); novolac epoxy where acid resistance is key.
- Ancillaries: Notched squeegee, gauge rake, spike roller, Jiffy mixer, planetary grinder/shot blaster, RH sleeves, hygrometer, IR thermometer, HEPA vac, moisture meters, dew point calculator.
Standards & criteria: ICRI CSP 2–5 (profile), ASTM F2170/F1869 (moisture), AS 4586 (slip resistance), manufacturer-specific DFT and recoat windows, and Indonesian SNI building code compliance for wet-area waterproofing and drainage. For hygiene-critical spaces, we align with HACCP cleaning norms.
For detailed insight into Teville’s quality controls across interior finishing Bali projects, see our construction workflow: How We Build and explore relevant Portfolio case studies within Bali villa construction.
Step-by-Step Process (Bali Wet Areas)
- Survey & Testing
- Map wet zones: showers, spa suites, BOH kitchens, laundries, pool surrounds.
- Check moisture (ASTM F2170/F1869), pH, and dew point; identify salts/efflorescence.
- Confirm slopes to drains; plan cove bases and threshold interfaces.
- Isolate & Protect
- Mask walls/fixtures; protect drains; ensure ventilation and dehumidification as required.
- Mechanical Surface Prep
- Grind or shot-blast to ICRI CSP 2–3 (thin-film) or CSP 3–5 (broadcast).
- Remove laitance, coatings, oils; HEPA vacuum thoroughly.
- Moisture/Vapor Mitigation
- Apply moisture-tolerant or vapor-barrier epoxy per MVER/RH results.
- Maintain substrate temperature ≥3°C above dew point to prevent blush.
- Crack & Joint Detailing
- Route/clean static cracks; bond with low-viscosity epoxy; cap with epoxy paste.
- Honor movement/control joints; fill post-topcoat with PU sealant where required.
- Drain & Slope Corrections
- Set stainless drains; form 1–2% falls using epoxy mortar where needed.
- Cove Base (Optional but Recommended)
- Trowel a 75–100 mm epoxy cove to seal wall-floor junctions; sand smooth.
- Primer Application
- Mix per manufacturer ratios; apply evenly by roller/squeegee; back-roll to uniform film.
- Light broadcast quartz for mechanical key if overcoating beyond recoat window.
- Build Coat(s)
- Apply pigmented 100% solids epoxy at specified DFT; spike-roll to release air.
- For non-slip: broadcast quartz to refusal; de-flake after cure.
- Decorative Options
- Optional vinyl flakes for visual depth and added traction; seal flakes before topcoat.
- Topcoat Sealing
- Apply aliphatic PU or polyaspartic topcoat; tune aggregate for P4–P5 slip rating.
- For high-chemical areas, consider novolac epoxy under a UV-stable finish.
- Detailing & Joints
- Re-cut and seal honored joints with PU; neatly terminate at drains and thresholds.
- Curing & Protection
- Respect cure windows (typically 24–72 hours). No water exposure during cure.
- Use breathable protection if other trades must enter (especially furniture installation).
- Quality Checks
- Adhesion testing (pull-off where specified), DFT verification, slip testing target class.
- Handover & Care Plan
- Issue cleaning and maintenance guidelines; schedule future recoat windows.
Explore similar process rigor across our Villa Projects and request a system-specific estimate via our Cost Estimation form.
Costs & Timeline (Indicative, 2026 Bali)
Final pricing depends on substrate condition, moisture mitigation scope, slip rating, and exposure class. As a Bali area guide for planning:
- Basic wet-area sealed epoxy (primer + build + PU topcoat, light texture): IDR 650,000–950,000 per m².
- Quartz broadcast non-slip (P4–P5), moisture-barrier epoxy included: IDR 900,000–1,400,000 per m².
- Novolac/chemical-resistant systems (BOH kitchens, pump rooms): IDR 1,200,000–1,800,000 per m².
- Cove base: IDR 120,000–220,000 per lm (75–100 mm height).
- Drain detailing/penetrations: IDR 350,000–750,000 per point (complexity-dependent).
- Substrate remediation (grinding, crack/joint repair, slope corrections): Survey-based.
Program durations (typical, weather/ventilation dependent):
 3124 m²6 month(s)from 123.000 USD
TALA 8
 3180 m²7 month(s)from 142.000 USD
Vasudeva
 1from 198.000 USD
Private: Haridas Villas
 164 m²7 month(s)from 79.000 USD
Private: Haridas Villas, Tegallalang
 172 m²8 month(s)from 120.000 USD
Keshava

Want to calculate?
 3104 m²11 month(s)from 99.000 USD
TALA 100
 3173 m²6 month(s)from 125.000 USD
TALA FOUR
 2144 m²11 month(s)from 104.000 USD
Narayana
164 m²7 month(s)from 79.000 USDTALA TWO
 4344 m²16 month(s)from 290.000 USD
Radha
 3127 m²9 month(s)from 177.000 USD
Mukunda
Start With Real Numbers, Not Guesses
Before finalizing your finishing works plan, check realistic cost ranges for your Bali villa project.
Available lands
 220 m²2 min$ 66565Bali, Cemagi
 585 m²8 min$ 165702Bali, Mengwi
 1100 m²8 min$ 280419Bali, Ungasan
 2700 m²30 min$ 314224Bali, Sidemen
 550 m²5 min$ 217629Bali, Tabanan
 2130 m²10 min$ 495776Bali, Pecatu
 660 m²10 min$ 175567Bali, Mengwi
 2115 m²5 min$ 1139547Bali, Pererenan
 10000 m²19 min$ 232759Bali, Buleleng
 3000 m²15 min$ 738916Bali, Cepaka
 2800 m²2 min$ 713793Bali, Kedungu
 13000 m²1 min$ 920567Bali, Pekutatan
 2000 m²5 min$ 738916Bali, Ungasan
 889 m²15 min$ 145612Bali, Cepaka
 500 m²15 min$ 124692Bali, Kaba Kaba
Essential Bali build & buy guides
- Bali villa construction cost per m² in 2026
- How much will your villa cost? Calculator
- Building a villa in Bali: the complete guide
- Buying land in Bali: step-by-step for foreigners
- Bali villa investment: yields, risks, returns
- Leasehold vs freehold: what foreigners can own
- Construction defect liability & 10-year warranty
- Bali building codes and construction standards
Related guides
Sanur and Nusa Dua vs Canggu: Stability Plays vs Hype
Canggu gets the headlines; Sanur and Nusa Dua quietly deliver steadier returns to a different kind of buyer. An honest 2026 comparison of the stability markets against the hype market — prices, demand drivers, oversupply risk, and who should buy where.
7 min read
Ubud and the Wellness Market: Buying or Building for Retreats
Ubud is Bali's wellness capital, and retreat-focused property behaves differently from beach villas: longer stays, group bookings, lower volatility. Here is what the market rewards, what zoning allows, and what it costs to buy or build a retreat property in 2026.
8 min read
Buying and Building on the Bukit: Uluwatu, Bingin and Balangan from a Buyer's Seat
A buyer's-seat 2026 guide to the Bukit peninsula — Uluwatu, Bingin and Balangan land prices, the water problem nobody budgets, cliff setbacks after the 2025 Bingin demolitions, and how to build there properly.
7 min read