Pivot Door Hardware for Bali Villa Entrances
The Challenge of Installing Pivot Hardware for Oversized Villa Entrances
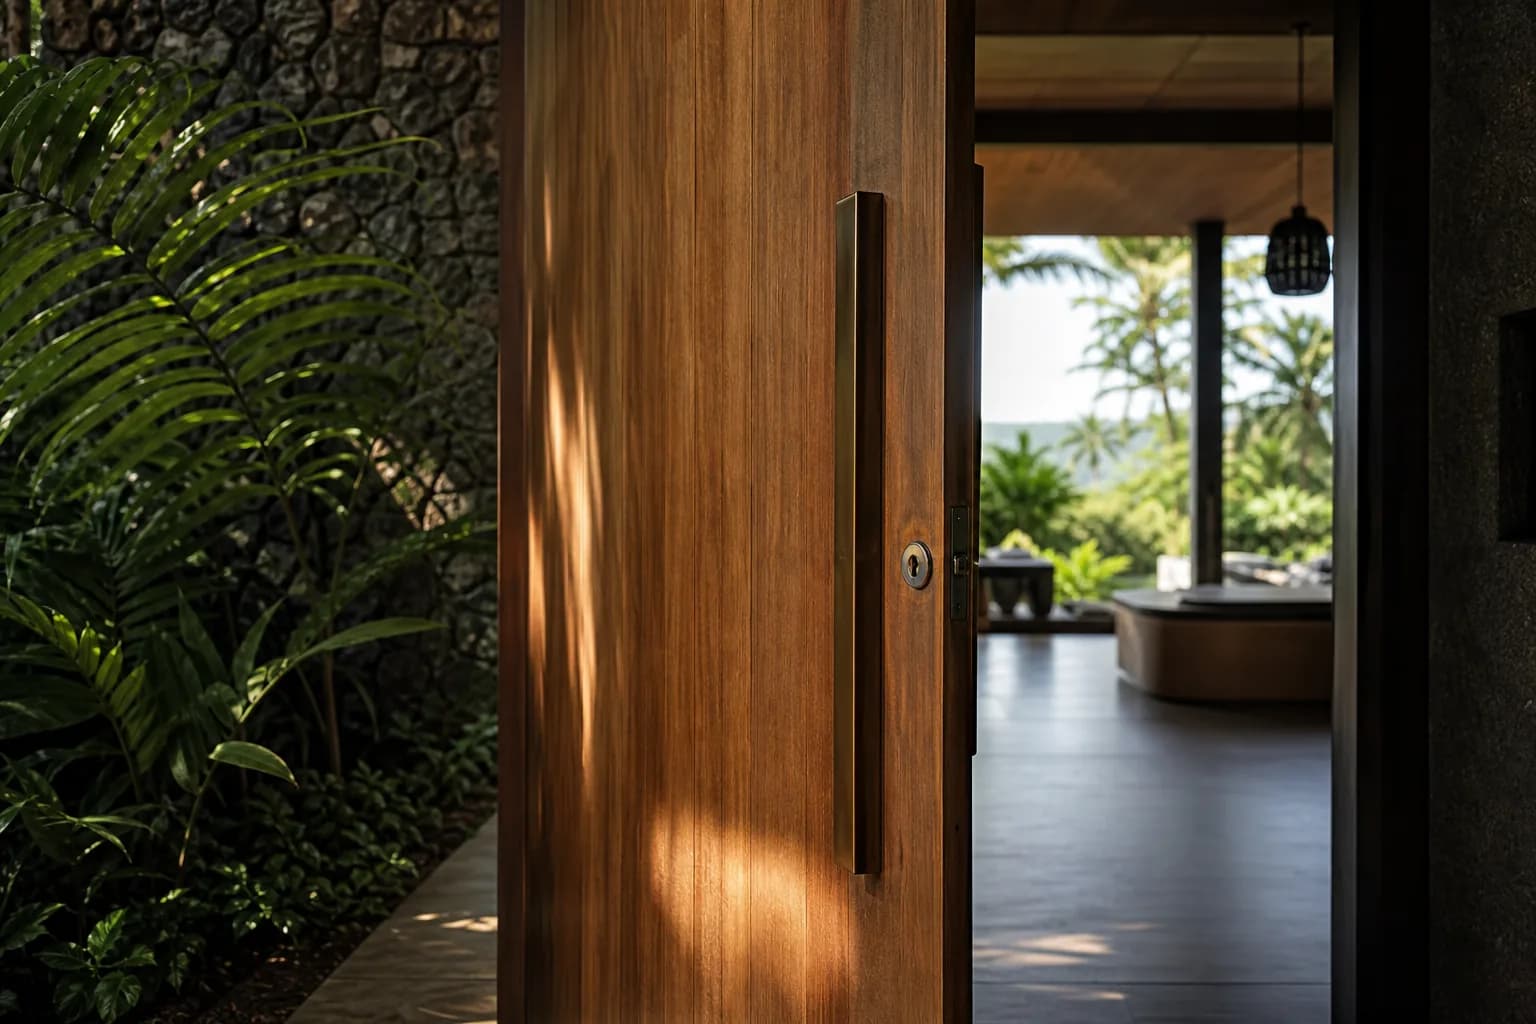
Wide-span pivot doors—those impressive 3-meter to 5-meter entrance statements common in luxury Bali villa construction—present unique installation challenges that standard door hardware simply cannot accommodate. The combination of extreme weight (often 150-300kg), tropical humidity fluctuations, and the need for flawless operation creates a technical finishing challenge that separates professional villa construction from amateur work. When a 4-meter solid teak pivot door fails within months due to improper hardware installation, the repair costs and structural modifications can exceed $8,000, not including the reputational damage to the property.
Technical Requirements for Wide-Span Pivot Door Hardware Systems
Installing pivot door hardware for wide-span Bali villa entrances requires understanding the fundamental mechanical principles that differ dramatically from conventional hinged doors. Unlike traditional side-hung doors where hinges carry the load along the door’s edge, pivot systems distribute weight through two critical load-bearing points: a floor-mounted pivot at the bottom and a ceiling or header-mounted pivot at the top. For doors exceeding 2.5 meters in width or 200kg in weight, the structural demands multiply exponentially.
The pivot offset—the distance from the door’s edge to the pivot point—typically ranges from 100mm to 150mm for wide-span installations. This offset creates the distinctive sweeping arc that makes pivot doors architecturally dramatic, but it also generates significant lateral forces on the mounting points. A 3-meter wide door with a 120mm offset creates approximately 25 times more rotational force than a standard 900mm door. This mechanical reality demands reinforced structural preparation that must be integrated during the villa’s framing stage, not retrofitted afterward.
Bali’s tropical climate introduces additional technical considerations absent in temperate construction markets. Humidity levels fluctuating between 60% and 95% cause solid timber doors to expand and contract by 3-8mm across their width seasonally. This movement must be accommodated within the pivot hardware’s tolerance range, requiring systems with adjustable bearing surfaces and corrosion-resistant materials. Stainless steel grade 316 or marine-grade aluminum alloys become mandatory specifications rather than premium options.
The weight capacity rating of pivot hardware must include a 40% safety margin beyond the door’s actual weight to account for dynamic loading during operation and wind pressure events. A 250kg door requires hardware rated for minimum 350kg capacity. This specification becomes critical in Bali villa construction where solid hardwood doors—teak, merbau, or ironwood—are standard rather than hollow-core alternatives. The hardware must also accommodate door thicknesses ranging from 60mm to 100mm, with some custom installations reaching 120mm for maximum thermal and acoustic insulation.
Professional-grade pivot systems for wide-span applications incorporate self-closing mechanisms with adjustable closing speeds, hold-open functions at specific angles, and soft-close dampening to prevent slamming. These features aren’t luxury additions—they’re essential for protecting the door, frame, and surrounding finishes from impact damage over thousands of operation cycles. The installation must also integrate weatherstripping and threshold seals that maintain contact throughout the door’s swing arc, a significantly more complex requirement than linear sealing on hinged doors.
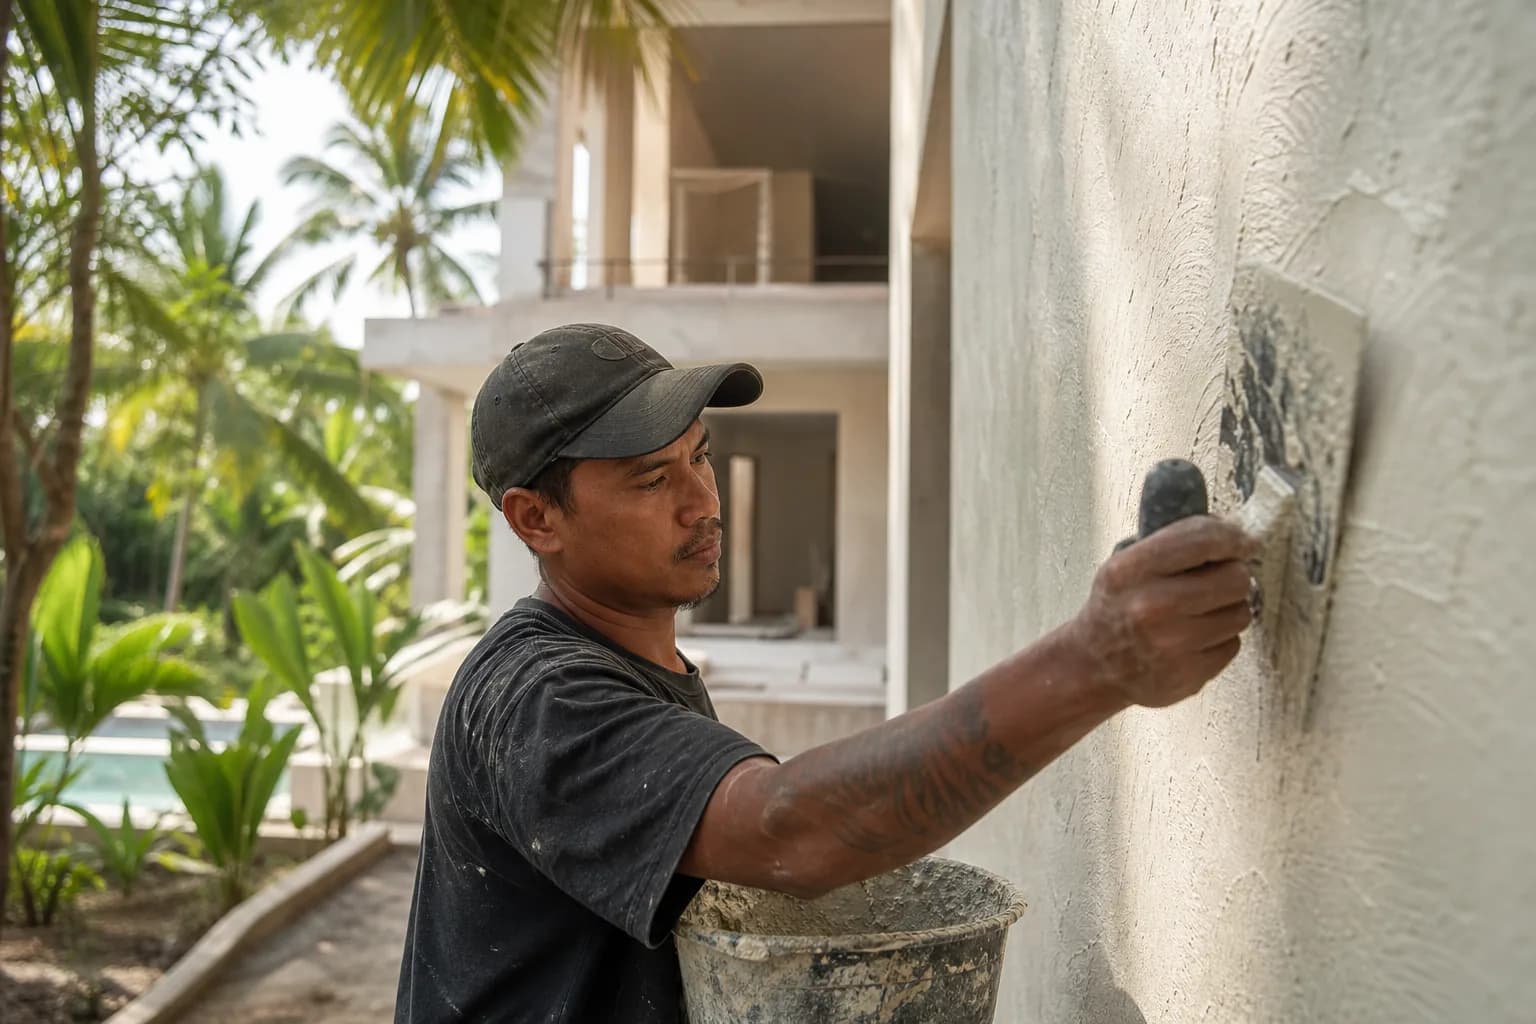
Material Specifications and Quality Standards for Tropical Applications
Selecting appropriate pivot hardware for Bali villa construction requires understanding material performance under sustained tropical exposure. The primary pivot bearing assemblies must utilize sealed ball bearing or roller bearing systems rather than simple bushing designs. Exposed bushings deteriorate rapidly in high-humidity environments, developing play and noise within 18-24 months. Quality bearing systems from manufacturers like FritsJurgens, Pivota, or Assa Abloy incorporate sealed cartridge bearings with corrosion-resistant housings that maintain smooth operation for 15+ years.
The floor pivot assembly bears the majority of the door’s weight and experiences the highest wear rates. Specifications should require cast stainless steel or machined aluminum bodies with replaceable bearing cartridges. The mounting plate must distribute load across minimum 200cm² of floor surface for doors exceeding 200kg. In Bali villa construction, where polished concrete, terrazzo, or natural stone flooring is standard, the floor pivot installation must be coordinated with the flooring contractor to ensure proper substrate preparation and anchor embedment depth of minimum 100mm into structural concrete.
Top pivot assemblies require different engineering considerations, as they primarily provide lateral stability rather than weight support. However, they must resist uplift forces during wind events—a critical consideration for open-plan Bali villas where cross-ventilation creates pressure differentials. The header mounting must penetrate into structural timber or concrete, not merely decorative ceiling elements. Minimum anchor depth of 80mm into solid material is required, with through-bolting preferred for installations in engineered lumber headers.
All fasteners, adjustment screws, and mounting hardware must be stainless steel grade A4 (316) minimum. Standard zinc-plated or grade A2 (304) stainless steel fasteners show surface corrosion within 6-12 months in coastal Bali locations. The additional material cost represents less than 3% of total hardware investment but prevents premature failure and maintains the installation’s aesthetic integrity throughout the villa’s service life.
Step-by-Step Installation Process for Wide-Span Pivot Doors
Phase 1: Structural Preparation and Verification (Days 1-2)
Before hardware installation begins, verify that the door opening’s structural preparation meets load-bearing requirements. The floor substrate must be level within 1mm across the pivot mounting area—a tolerance that requires precision grinding or self-leveling compound application in most cases. Use a digital level or laser level to confirm both the floor plane and the header alignment. Any deviation exceeding 2mm will translate into binding or gaps as the door swings through its arc.
Confirm the header or ceiling structure above the door opening can support the top pivot’s lateral loads. For timber-framed villas, this typically requires a doubled or tripled header beam with blocking between joists. In concrete construction, verify minimum 150mm slab thickness at the mounting location. Mark the exact pivot locations on both floor and ceiling, ensuring they align vertically within 3mm tolerance—misalignment causes accelerated bearing wear and operational issues.
Phase 2: Floor Pivot Installation (Day 2)
The floor pivot installation sequence begins with core drilling or chiseling the mounting recess to the manufacturer’s specified depth, typically 100-120mm for heavy-duty systems. The recess diameter must accommodate the pivot body plus 20mm clearance for adjustment and grouting. Clean all concrete dust and debris thoroughly—any contamination prevents proper adhesive bonding of the mounting compound.
Set the floor pivot assembly using high-strength, non-shrink epoxy grout specifically formulated for dynamic loading applications. Standard tile adhesive or general-purpose concrete mix lacks the compressive strength and vibration resistance required. Position the pivot with its adjustment range centered, allowing equal movement in all directions for final calibration. The top surface of the floor pivot must finish flush with or maximum 2mm below the final floor surface—any protrusion creates a trip hazard and aesthetic flaw.
Phase 3: Door Preparation and Hardware Mounting (Days 3-4)
With the door positioned horizontally on padded sawhorses, mark the precise locations for the pivot spindle mortises. These mortises must be machined perpendicular to the door faces within 0.5-degree tolerance. Use a drill press or router jig rather than handheld tools—accuracy at this stage determines whether the door operates smoothly or binds. The mortise depth must allow the pivot spindle to seat fully while maintaining the specified door-to-floor clearance of 8-12mm.
Install the pivot spindles into the door using the manufacturer’s specified adhesive or mechanical fasteners. For solid timber doors in Bali’s climate, allow wood movement by avoiding rigid adhesive bonds at the spindle perimeter—use flexible polyurethane construction adhesive rather than epoxy. The spindle must be installed perfectly perpendicular to the door face; even 1-degree deviation causes the door to swing out of plane.
Phase 4: Top Pivot and Frame Installation (Day 4)
Install the top pivot assembly into the header or ceiling structure using through-bolts where possible, or minimum 80mm deep anchor bolts into solid material. The top pivot’s lateral adjustment range must be verified before final tightening—you’ll need this adjustment capability during door alignment. Install any integrated door closers or hold-open mechanisms according to manufacturer specifications, ensuring hydraulic lines (if present) are properly bled of air.
Phase 5: Door Hanging and Calibration (Day 5)
Door hanging requires minimum two installers for safety and precision. Lift the door vertically, engaging the bottom spindle into the floor pivot first, then swing the door upright to engage the top spindle into the ceiling pivot. This sequence prevents damage to the pivot mechanisms. With the door in position, begin the calibration process by adjusting the floor pivot’s lateral position until the door hangs plumb and the reveal gaps are consistent on both sides—typically 3-4mm for weather-sealed installations.
Adjust the closing speed and latching force if the system includes integrated closers. Test the door through 50+ complete operation cycles, checking for binding points, unusual noise, or resistance. Fine-tune the adjustments until operation is effortless throughout the entire swing arc. Install the final weatherstripping, threshold seals, and any decorative trim pieces only after confirming perfect mechanical operation.
Cost Analysis and Installation Timeline for Bali Villa Projects
Professional pivot door hardware installation for wide-span Bali villa entrances involves distinct cost components that vary based on door dimensions, weight, and system complexity. Hardware procurement for a 3-meter wide, 250kg solid timber door typically ranges from $2,800 to $6,500 for quality systems suitable for tropical applications. This includes the floor pivot assembly, top pivot, integrated closer mechanism, and all mounting hardware. Premium systems with advanced features like electronic access integration or motorized operation can reach $12,000-$18,000.
Professional installation labor by experienced finishing contractors in Bali costs approximately $800-$1,400 for standard installations, increasing to $1,800-$2,500 for complex scenarios requiring structural modifications or custom fabrication. This labor estimate assumes the door opening is properly prepared and the door itself is pre-finished. Additional costs include structural reinforcement materials ($300-$800), specialized tools and equipment rental ($150-$300), and weatherproofing materials ($200-$400).
The installation timeline for a single wide-span pivot door entrance spans 5-7 working days from structural preparation through final calibration and finishing. This schedule assumes materials are on-site and the door opening is accessible. Projects involving multiple pivot doors or requiring coordination with other finishing trades may extend to 10-14 days. Rushing this timeline compromises installation quality—proper curing time for mounting compounds and methodical calibration cannot be accelerated without risking long-term performance issues.
For villa construction projects managed by Teville’s full-cycle construction process, pivot door hardware installation is coordinated within the interior finishing phase, typically occurring after flooring installation but before final trim carpentry. This sequencing ensures proper integration with adjacent finishes while protecting the door hardware from damage during other construction activities.
Frequently Asked Questions About Pivot Door Hardware Installation
Can pivot door hardware be retrofitted to existing villa entrances?
Retrofitting pivot hardware to existing hinged door openings is technically feasible but requires significant structural evaluation and modification. The existing door frame must be removed, and the floor substrate must be assessed for adequate thickness and strength to accommodate the floor pivot assembly. In many cases, the header structure requires reinforcement to handle the different load distribution of pivot systems. Retrofit installations typically cost 40-60% more than new construction installations due to the additional demolition, structural work, and finish matching required. For Bali villas with existing solid timber doors, the door itself may need modification or replacement if it wasn’t originally constructed with the thickness and structural integrity required for pivot hardware mounting.
How do I maintain pivot door hardware in Bali’s tropical climate?
Maintenance for pivot door hardware in tropical environments requires quarterly inspection and lubrication of all moving components. Use marine-grade lithium grease or manufacturer-specified lubricants on bearing surfaces—never use WD-40 or penetrating oils, which attract dust and degrade over time. Check all mounting fasteners for tightness every six months, as thermal expansion cycles can cause gradual loosening. Inspect weatherstripping and threshold seals annually, replacing them when compression set or tearing becomes evident. The floor pivot area should be kept clear of sand and debris, which accelerate bearing wear. For coastal villa locations within 500 meters of the ocean, increase inspection frequency to monthly and consider applying corrosion-inhibiting coatings to exposed metal surfaces annually.
What door weight limits apply to different pivot hardware systems?
<
 3104 m²11 month(s)from 99.000 USD
TALA 100
 2144 m²11 month(s)from 104.000 USD
Narayana

Want to calculate?
 3180 m²7 month(s)from 142.000 USD
Vasudeva
 1from 198.000 USD
Private: Haridas Villas
 4344 m²16 month(s)from 290.000 USD
Radha
 164 m²7 month(s)from 79.000 USD
TALA TWO
 3173 m²6 month(s)from 125.000 USD
TALA FOUR
 3127 m²9 month(s)from 177.000 USD
Mukunda
 172 m²8 month(s)from 120.000 USD
Keshava
164 m²7 month(s)from 79.000 USDPrivate: Haridas Villas, Tegallalang
 3124 m²6 month(s)from 123.000 USD
TALA 8
Start With Real Numbers, Not Guesses
Before finalizing your finishing works plan, check realistic cost ranges for your Bali villa project.
Available lands
 1000 m²10 min$ 123154Bali, Jimbaran
 3300 m²15 min$ 449889Bali, Tabanan
 515 m²7 min$ 570813Bali, Canggu
 1362 m²15 min$ 335468Bali, Tumbak
 29000 m²6 min$ 3857143Bali, Tabanan
 500 m²15 min$ 124692Bali, Kaba Kaba
 770 m²5 min$ 163578Bali, Kedungu
 444 m²10 min$ 111000Bali, Tabanan
 615 m²15 min$ 113608Bali, Tabanan
 4270 m²10 min$ 394397Bali, Ubud
 2700 m²30 min$ 314224Bali, Sidemen
 550 m²15 min$ 164594Bali, Mengwi
 1100 m²8 min$ 280419Bali, Ungasan
 1350 m²5 min$ 283467Bali, Pecatu
 700 m²15 min$ 90517Bali, Central Bali
Planning a build in Bali?
Get a feasibility view, budget range and timeline from Teville.
Related guides
Resin-Infused Plaster Finishes: Anti-Salt Systems Bali
Expert technical guide: Resin-Infused Plaster Finishes: Anti-Salt Systems Bali
8 min read
Prefinished Timber Joinery: Silicone Seals Fixings Bali
Professional prefinished timber joinery installation in Bali with silicone seals and fixings for durable weatherproof performance and a premium finish.
10 min read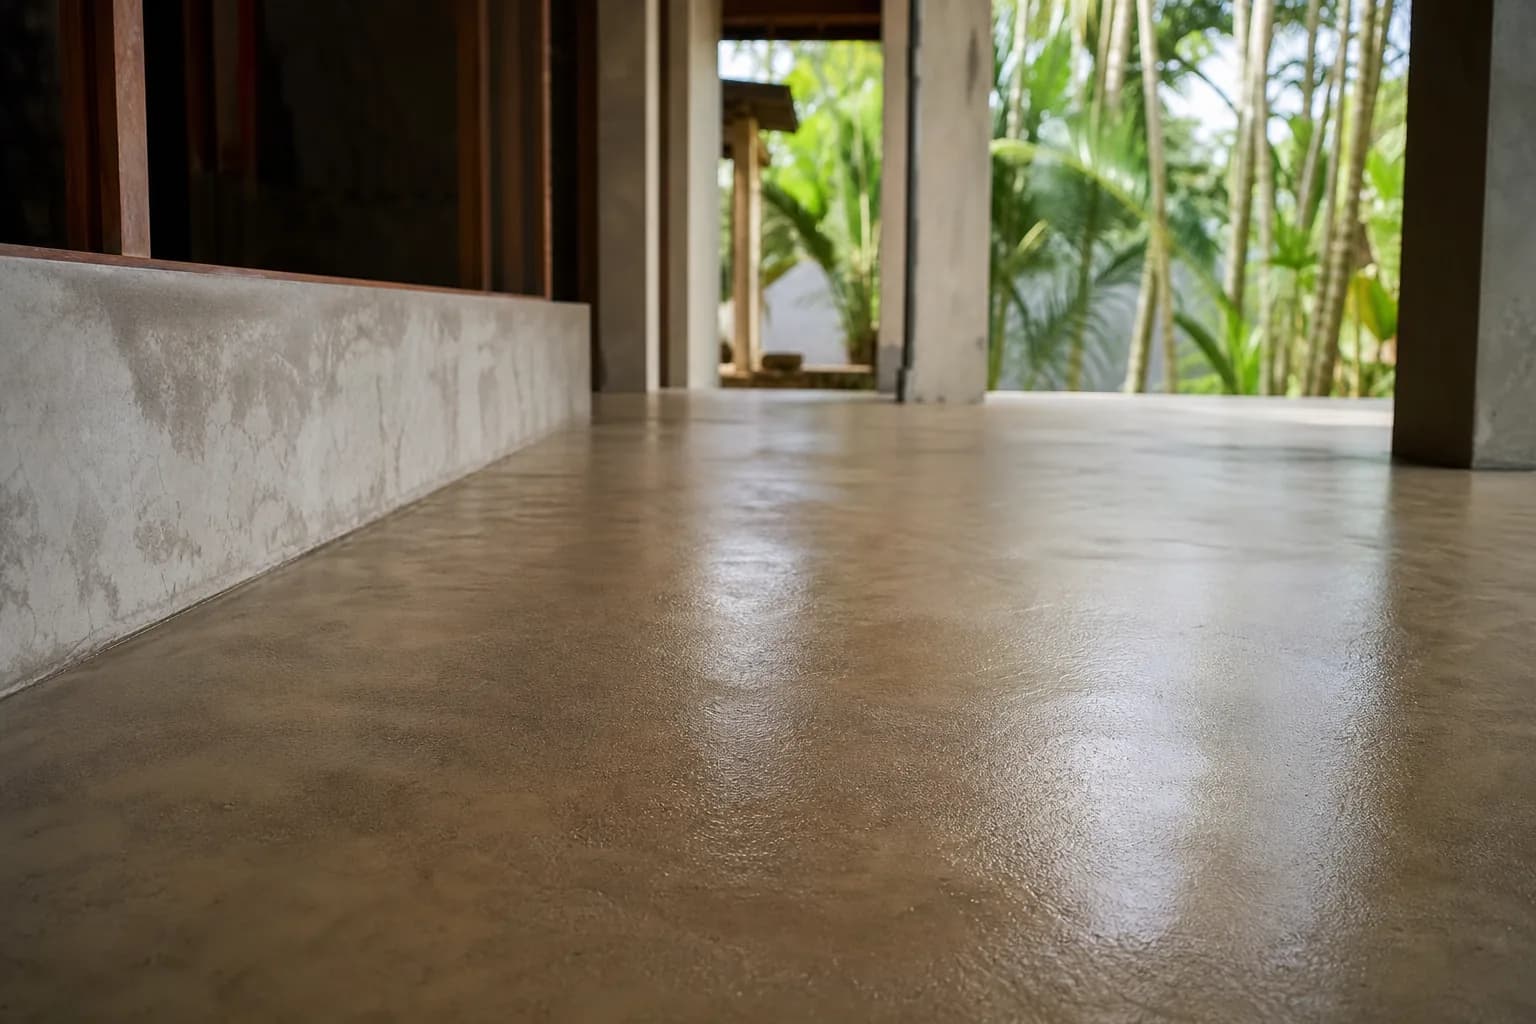
Polished Concrete Microtopping: Surface Prep Sealants Bali
Discover Bali s polished concrete microtopping: expert surface prep, durable sealants, and a flawless finish for modern floors with minimal maintenance.
9 min read