Kitchen Exhaust Hood Ducting CFM Requirements Bali Villas
Kitchen Exhaust Hood Ducting: CFM Requirements for Bali Villas
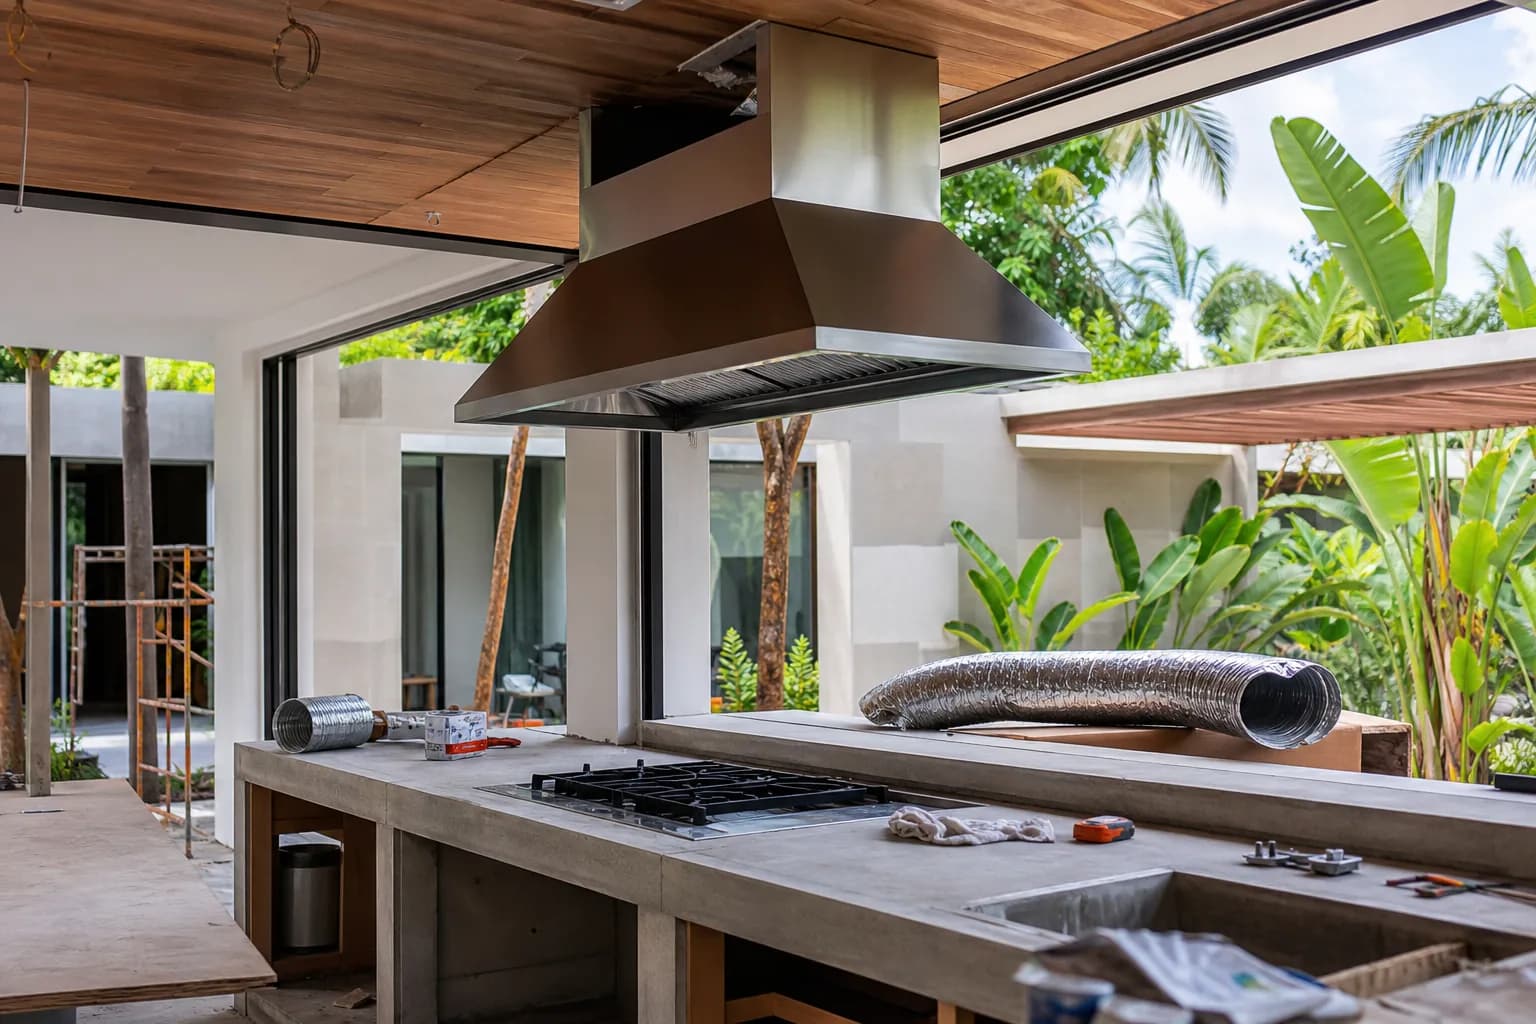
When renovating or constructing a villa kitchen in Bali, one of the most frequently overlooked technical specifications is proper kitchen exhaust hood ducting and CFM (Cubic Feet per Minute) capacity. Many villa owners discover too late that their beautifully designed kitchen suffers from persistent cooking odors, excessive heat buildup, and grease accumulation on walls and ceilings—all symptoms of inadequate ventilation planning. The tropical climate of Bali, combined with high humidity levels averaging 75-85%, makes proper exhaust ventilation not just a comfort issue but a critical component of interior finishing quality and long-term durability. Without correctly sized ducting and appropriate CFM ratings, even premium kitchen finishes deteriorate rapidly in Bali’s challenging environment.
Technical Requirements: Understanding CFM Calculations for Bali Villa Kitchens
The CFM rating of a kitchen exhaust hood represents the volume of air the system can move per minute, and calculating the correct requirement involves multiple technical factors specific to Bali villa construction. For standard residential cooking with gas or electric cooktops, the baseline calculation starts at 100 CFM per linear foot of cooktop width. A typical 36-inch (3-foot) cooktop therefore requires a minimum of 300 CFM. However, this baseline must be adjusted significantly for Bali’s tropical conditions and the cooking styles common in villa kitchens.
For high-BTU cooking equipment popular in luxury Bali villas—including professional-grade gas ranges and wok burners—the calculation shifts to BTU-based requirements. The standard formula requires 1 CFM for every 100 BTU of heat output. A 60,000 BTU range would therefore need 600 CFM minimum capacity. When installing commercial-style equipment in villa kitchens, which is increasingly common in high-end Bali villa construction projects, CFM requirements can easily exceed 900-1200 CFM.
Bali’s tropical climate introduces additional technical considerations that mainland construction standards don’t address. The constant high humidity means cooking moisture doesn’t dissipate naturally through building materials as it would in drier climates. This requires increasing baseline CFM calculations by 15-20% to prevent moisture accumulation in kitchen spaces. Additionally, many Bali villas feature open-plan designs that connect kitchens to living areas—a layout that demands higher exhaust capacity to prevent cooking odors from permeating throughout the villa.
Ducting configuration dramatically impacts actual performance versus rated CFM. Every 90-degree elbow in the ductwork reduces effective airflow by approximately 25 CFM, while each additional meter of horizontal ducting reduces capacity by 5-8 CFM. In Bali villa renovations, where existing structural constraints often force complex ducting routes, these losses compound quickly. A hood rated at 600 CFM might deliver only 400 CFM of actual performance after accounting for three elbows and eight meters of horizontal ducting—a 33% reduction that leaves the kitchen significantly under-ventilated.
The ducting diameter itself must match the CFM requirements. For systems up to 400 CFM, 6-inch diameter ducting suffices. Systems between 400-600 CFM require 8-inch ducting, while anything above 600 CFM demands 10-inch or larger diameter pipes. Undersized ducting creates excessive back-pressure, forcing the exhaust fan to work harder, generating more noise, consuming more electricity, and ultimately failing prematurely. During interior finishing Bali projects, we frequently encounter existing installations with 6-inch ducting connected to 800 CFM hoods—a fundamental mismatch that renders the expensive hood nearly useless.
Makeup air requirements represent another critical technical consideration often ignored in Bali villa kitchens. When an exhaust hood removes 600+ CFM from a kitchen, that air must be replaced from somewhere. In tightly constructed modern villas with air conditioning, this creates negative pressure that can cause doors to slam, interfere with air conditioning efficiency, and even cause dangerous backdrafting of gas appliances. For systems exceeding 400 CFM, dedicated makeup air systems should be integrated into the ventilation design, adding complexity but ensuring safe, effective operation.
Materials and Standards for Tropical Climate Durability
Selecting appropriate materials for kitchen exhaust systems in Bali requires understanding how tropical conditions accelerate corrosion and degradation. Standard galvanized steel ducting, common in temperate climates, typically fails within 3-5 years in Bali’s coastal humidity. The combination of cooking grease, moisture, and salt air creates aggressive corrosion that perforates thin-gauge galvanized steel surprisingly quickly.
For renovation Bali projects prioritizing longevity, 304-grade stainless steel ducting represents the optimal choice. While initial material costs run 3-4 times higher than galvanized alternatives, stainless steel maintains structural integrity for 15-20+ years in tropical conditions. The 0.6mm minimum wall thickness provides adequate strength while remaining workable during installation. For villas within 5 kilometers of the coast—which includes most of Seminyak, Canggu, and Uluwatu—316-grade stainless steel offers even superior corrosion resistance, though at premium pricing.
Ducting joints and connections require equal attention to material quality. Aluminum foil tape, despite being widely available and inexpensive, degrades rapidly in Bali’s heat and humidity. Professional installations use high-temperature silicone sealant rated to 260°C minimum, combined with stainless steel draw bands at every joint. This combination maintains airtight seals even as materials expand and contract with temperature fluctuations.
The exhaust hood itself should feature double-wall construction with powder-coated stainless steel surfaces. Single-wall hoods, regardless of CFM rating, allow excessive heat transfer to surrounding cabinetry and finishes. In tropical climates where ambient temperatures already stress materials, this additional heat accelerates deterioration of cabinet finishes, particularly on upper cabinets adjacent to the hood. Baffle filters constructed from stainless steel provide superior grease capture compared to aluminum mesh alternatives, and they withstand repeated cleaning without warping or corroding.
Step-by-Step Installation Process for Optimal Performance
Proper kitchen exhaust hood installation begins during the design phase, not during finishing works. The ducting route must be planned before ceiling structures are finalized, as retrofitting adequate ducting through completed ceilings often proves impossible without major demolition. The exhaust termination point should be located on an exterior wall or through the roof, positioned at least 3 meters from any windows, doors, or air conditioning intakes to prevent recirculation of exhaust air.
Phase 1: Structural Preparation and Ducting Route Planning
Before any ducting installation begins, the complete route from hood to exterior termination must be mapped with precise measurements. Each elbow, transition, and horizontal run should be documented. Calculate total equivalent length by adding actual length plus 2 meters for each 90-degree elbow. If equivalent length exceeds 10 meters for a 600 CFM system, consider increasing hood capacity by 20% to compensate for pressure losses. Mark all ceiling penetrations and verify no conflicts exist with structural beams, electrical conduits, or plumbing lines.
Phase 2: Ducting Installation and Sealing
Install ducting working backward from the exterior termination point toward the hood location. This approach ensures proper overlap at joints, with each section inserted into the previous section in the direction of airflow. Secure each joint with three stainless steel draw bands spaced evenly around the circumference, then seal completely with high-temperature silicone. Support horizontal ducting runs every 1.5 meters using adjustable metal hangers—never rest ducting on ceiling joists or other structures, as vibration will eventually cause failures.
Where ducting passes through walls or ceilings, install fire-rated collar assemblies that maintain the fire rating of the penetrated assembly. This requirement, while often ignored in Bali construction, represents critical life-safety infrastructure. The collar assembly also provides proper support and prevents direct contact between ducting and building materials, which can transmit vibration noise throughout the structure.
Phase 3: Hood Mounting and Connection
Wall-mounted hoods require substantial backing support, as the combined weight of the hood, ducting, and grease accumulation can exceed 50 kilograms. Install 12mm plywood backing between wall studs, secured with construction adhesive and screws at 200mm centers. The hood mounting height should position the bottom surface 650-750mm above the cooktop surface—lower heights improve capture efficiency but risk head clearance issues, while higher mounting significantly reduces effectiveness.
Connect the hood to ducting using a flexible transition section 300-450mm in length. This flexible section, constructed from aluminum or stainless steel, absorbs vibration and allows minor alignment adjustments. Never use flexible ducting for runs longer than 600mm, as the corrugated interior creates excessive airflow resistance. Seal the transition connections with high-temperature silicone and secure with draw bands.
Phase 4: Exterior Termination and Weather Protection
The exterior termination requires a weather-resistant cap with integrated backdraft damper. In Bali’s monsoon conditions, standard gravity dampers often fail to close completely, allowing rain infiltration that travels back through the ducting system. Spring-loaded dampers provide more reliable closure but require annual maintenance to prevent corrosion-related failures. Position the termination cap with a slight downward angle and install a drip edge to direct water away from the building surface.
Phase 5: Testing and Commissioning
After installation completion, conduct comprehensive performance testing. Operate the hood at maximum speed and verify airflow at the cooktop surface using smoke pencils or tissue paper. Strong, consistent draw across the entire cooktop width indicates proper installation. Check all joints for air leaks using the same smoke test method. Measure sound levels at various speeds—properly installed systems should not exceed 65 decibels at maximum speed when measured from 1 meter distance. Finally, verify the backdraft damper opens fully during operation and closes completely when the hood is off.
Cost Considerations and Installation Timeline
Kitchen exhaust hood system costs for Bali villa projects vary significantly based on CFM requirements, material specifications, and installation complexity. A complete system for a standard villa kitchen with 400-600 CFM capacity, including mid-range stainless steel hood, proper ducting, and professional installation, typically ranges from IDR 15,000,000 to IDR 28,000,000. This assumes relatively straightforward ducting routes with 6-8 meters total length and no more than two elbows.
High-performance systems for luxury villa kitchens with 800-1200 CFM capacity, commercial-grade equipment, and premium materials can reach IDR 45,000,000 to IDR 75,000,000. These systems typically include makeup air integration, variable-speed controls, and extended stainless steel ducting runs. For villa utilities upgrades in existing properties, costs increase by 25-40% due to access challenges and the need to work around existing finishes.
Material costs break down approximately as follows: the hood unit itself represents 40-50% of total system cost, ducting materials account for 20-25%, installation labor comprises 25-30%, and miscellaneous components (mounting hardware, sealants, termination caps) make up the remaining 5-10%. Choosing stainless steel ducting over galvanized adds approximately IDR 3,500,000 to IDR 6,000,000 to material costs but eliminates replacement expenses within 5-7 years.
Installation timeline for new construction projects typically requires 3-4 working days for a standard system, scheduled during the finishing works phase after ceiling framing is complete but before final ceiling installation. Complex systems with makeup air integration or challenging ducting routes may extend to 5-7 working days. Renovation projects in occupied villas require additional time for protection of existing finishes and typically take 5-6 working days for standard installations.
Frequently Asked Questions About Kitchen Exhaust Systems
Can I install a recirculating hood instead of ducted exhaust to avoid complex installation?
While recirculating hoods eliminate ducting requirements, they prove inadequate for Bali’s tropical climate. These systems filter grease but return heat and moisture to the kitchen, exacerbating humidity problems that already challenge villa interiors. Recirculating hoods also require frequent filter replacement—every 3-4 months in typical use—with replacement filters often difficult to source in Bali. For serious cooking or any gas appliances, ducted exhaust remains the only effective solution.
How does villa location in Bali affect exhaust system requirements?
Coastal villas within 3-5 kilometers of the ocean require upgraded corrosion protection, making stainless steel ducting essential rather than optional. Salt air accelerates corrosion dramatically, and galvanized steel systems fail within 2-3 years in these locations. Inland villas in Ubud or Tabanan face less corrosion stress but still require tropical-rated materials due to high humidity. Elevation also matters—villas above 400 meters elevation experience slightly lower humidity and can sometimes use standard-grade materials, though stainless steel remains recommended for longevity.
What maintenance does a kitchen exhaust system require in Bali?
Monthly cleaning of baffle filters prevents grease buildup that reduces airflow and creates fire hazards. Remove filters and clean with degreasing detergent and hot water, or run through a dishwasher. E
 3173 m²6 month(s)from 125.000 USD
TALA FOUR
 3104 m²11 month(s)from 99.000 USD
TALA 100
 3127 m²9 month(s)from 177.000 USD
Mukunda
 172 m²8 month(s)from 120.000 USD
Keshava
 3180 m²7 month(s)from 142.000 USD
Vasudeva
 164 m²7 month(s)from 79.000 USD
Private: Haridas Villas, Tegallalang
 3124 m²6 month(s)from 123.000 USD
TALA 8
 4344 m²16 month(s)from 290.000 USD
Radha
 2144 m²11 month(s)from 104.000 USD
Narayana
 1from 198.000 USD
Private: Haridas Villas

Want to calculate?
164 m²7 month(s)from 79.000 USDTALA TWO
Start With Real Numbers, Not Guesses
Before finalizing your finishing works plan, check realistic cost ranges for your Bali villa project.
Available lands
 2000 m²15 min$ 110837Bali, Karangasem
 1430 m²5 min$ 209862Bali, Klungkung
 800 m²10 min$ 307882Bali, Tibubeneng
 770 m²5 min$ 163578Bali, Kedungu
 2680 m²10 min$ 1732759Bali, Pererenan
 7500 m²5 min$ 206281Bali, Kedungu
 1000 m²10 min$ 184729Bali, Kutuh South Bali
 1660 m²10 min$ 343448Bali, Kerobokan
 1000 m²10 min$ 230911Bali, Kerobokan
 1000 m²8 min$ 134544Bali, Bukit
 200 m²11 min$ 89286Bali, Tabanan
 3000 m²15 min$ 1246921Bali, Tabanan
 1100 m²8 min$ 280419Bali, Ungasan
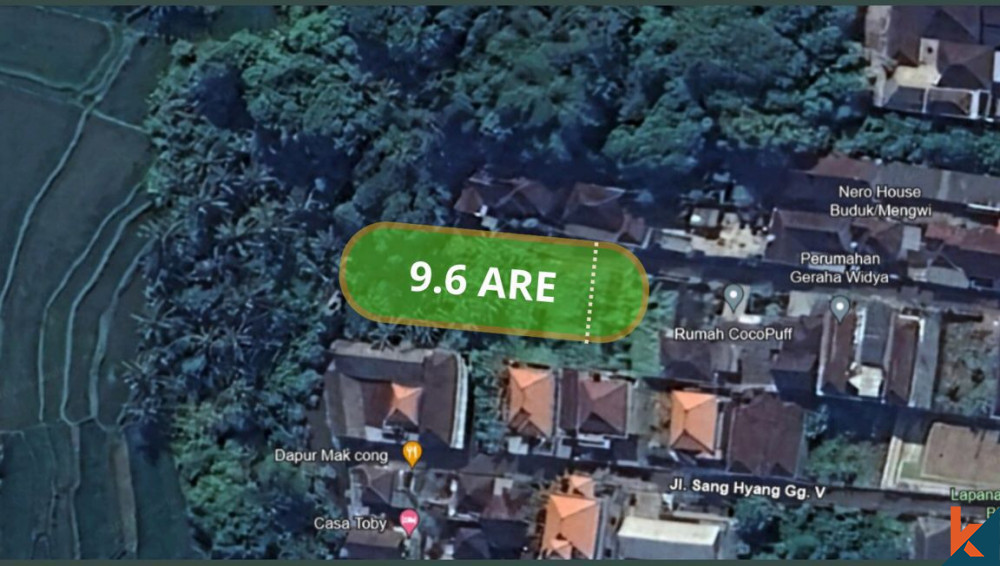 960 m²15 min$ 91034Bali, Mengwi
 1600 m²32 min$ 266010Bali, Tabanan
Planning a build in Bali?
Get a feasibility view, budget range and timeline from Teville.
Related guides
Resin-Infused Plaster Finishes: Anti-Salt Systems Bali
Expert technical guide: Resin-Infused Plaster Finishes: Anti-Salt Systems Bali
8 min read
Prefinished Timber Joinery: Silicone Seals Fixings Bali
Professional prefinished timber joinery installation in Bali with silicone seals and fixings for durable weatherproof performance and a premium finish.
10 min read
Polished Concrete Microtopping: Surface Prep Sealants Bali
Discover Bali s polished concrete microtopping: expert surface prep, durable sealants, and a flawless finish for modern floors with minimal maintenance.
9 min read