Concealed Joinery Fixings: Stainless Inserts Epoxy for Bali
Concealed Joinery Fixings: Stainless Inserts & Epoxy for Bali
1) Specific Problem/Question
In Bali’s tropical, salt-laden climate, visible fasteners in cabinetry and furniture quickly corrode, telegraph through finishes, and loosen as timber moves with humidity. How do we achieve clean, minimal lines in high-end villa interiors—especially for renovation Bali projects and new Bali villa construction—without compromising durability or serviceability? The answer is a disciplined concealed fixing strategy built around marine-grade stainless steel inserts and structural epoxy bonding, detailed for local hardwoods and moisture conditions, and installed under controlled finishing workflows by a specialist team.
2) Technical Deep Dive: Why Stainless Inserts + Epoxy Are the Bali Standard
In interior finishing Bali environments, the highest-performing concealed fixing assemblies pair threaded stainless inserts with a compatible two-part epoxy adhesive system. This combination delivers three critical outcomes: corrosion resistance, stable load transfer, and a seamless aesthetic suitable for premium furniture installation and built-in works.
Corrosion resistance under tropical exposure
Even indoors, Bali’s airborne chlorides penetrate sliding doors and louvered façades. Conventional steel fixings rust, bleed into timber, and swell the surrounding grain. AISI 304 stainless is acceptable for most interior works, but in coastal villas or wet rooms (ensuites, spas, pool pavilions), AISI 316 (“A4”) stainless hardware is preferred for superior pitting resistance. Concealed hinges and fittings, such as stainless concealed mortise hinges (e.g., Sugatsune R Series constructed from 303/304 stainless—see wwhardware.com), maintain finish integrity in these conditions, avoiding brown streaks and premature hinge wear.
Stable load transfer with timber movement
Balinese hardwoods (teak, merbau, bengkirai), as well as engineered panels, will expand/contract seasonally. A bare wood screw in an edge grain joint invites creep and loosening. A threaded insert anchors into the substrate with a predictable external thread profile and internal machine thread. When bonded with epoxy, this creates a composite “sleeve” that spreads loads across more fibers, reduces crushing, and provides a repeatable torque setting for disassembly/re-assembly during maintenance or renovation Bali works. This is crucial for removable access panels over villa utilities (electrical boards, AV racks, plumbing inspection points) where hidden fixings must remain serviceable.
Clean, hidden finishes
Architectural intent in luxury Bali villa construction favors flush planes: shadow-gap wardrobes, floating vanities, and monolithic wall panels. Visible screw cups or plugs break the line. Concealed inserts sit below the surface; fixing bolts approach from the rear or through slotted cleats. For moving components (doors, lids), stainless concealed hinges keep exterior faces pristine while meeting load and cycle requirements. Complementary corrosion-protected accessories—like epoxy-coated drawer slides (e.g., Salice Euro self-close slides—see woodworkerexpress.com)—maintain smooth action in humid spaces.
Why epoxy—not PU or PVA—inserts?
PUs and PVAs are valuable but have limitations in wet/hot cycles. Structural epoxies provide higher bond strength, gap-filling, and exceptional creep resistance at elevated temperatures, with excellent adhesion to oily woods (teak) when properly surface-prepped. Epoxy also encapsulates insert flanks, sealing end grain against moisture ingress. For finishing works, this reduces post-installation movement lines and protects clear coats from fiber lift.
Design implications for Bali interiors
– Finite element thinking at a joinery scale: choose insert diameters that distribute shear, and specify shoulder washers where needed to avoid crushing veneer cores.
– Tolerance for movement: use slotted rails or keyhole plates with concealed bolts to permit seasonal float while keeping faces tight.
– Service pathways: incorporate removable, flush panels (magnet-assisted catches with rear bolts into inserts) for villa utilities access, maintaining sightlines in living rooms and spas.
– Acoustic and vibration control: epoxy-bonded inserts reduce micro-fretting at joints, helpful for AV cabinetry and wine rooms where rattle is unacceptable.
Quality assurance in the field
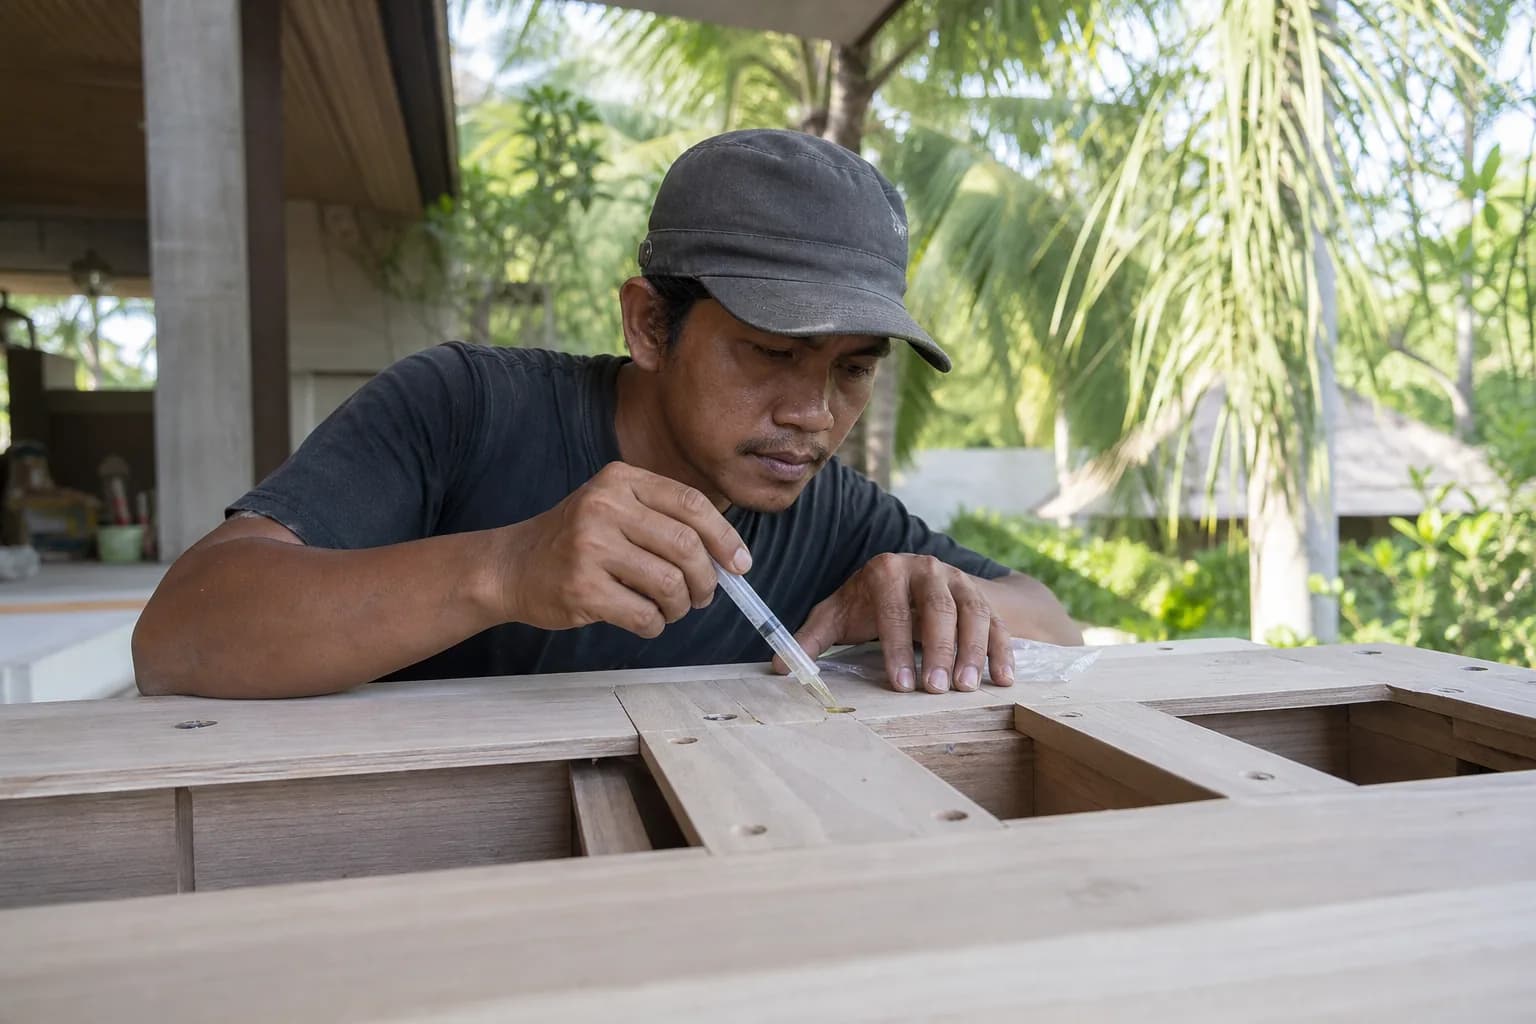
Teville’s finishing teams track substrate moisture content (MC) at installation—12–14% MC for interior fit-out is a typical target window in Bali—because MC directly affects torque retention. Pilot holes are bored with sharp brad-point bits; edges are lightly chamfered to prevent grain lift. Epoxy mix ratios are controlled by weight. Inserts are seated to a predetermined depth with stop collars, and squeeze-out is managed for clean cavities. These are small steps, but together they deliver a flawless face and long service life.
Where it applies
– Wardrobes and wall paneling with blind fixings
– Vanities, kitchens, and utility cabinets in humid zones
– Feature doors with concealed stainless hinges
– Floating shelving with hidden studs and rear inserts
– Furniture installation in renovation Bali projects where existing substrates vary
– Access hatches for MEP behind stone/wood cladding
Showcasing and trend signals
At regional woodworking showcases (including Bali 2026–style events highlighting modern cabinetry), concealed stainless systems and epoxy-bonded assemblies are consistently presented as best practice for humid, marine-influenced climates. The methods below reflect that standard, adapted to Teville’s site controls and finish expectations. Explore our villa portfolio for examples: teville.com/portfolio/.
3) Materials & Standards
Metals
– AISI 304 stainless steel inserts/bolts for general interiors; AISI 316 for coastal-facing rooms, wet areas, and spa/pool pavilions.
– ISO 3506 classification for stainless fasteners; specify A4 where chloride exposure is likely.
– Passivated stainless per ASTM A967 where available, improving resistance to surface contamination during handling.
Timber & sheet goods
– Teak, merbau, bengkirai, nyatoh, and moisture-resistant MDF or birch ply with marine-grade bonding. For veneers, choose phenolic-bonded cores to mitigate edge swelling around inserts.
– Stable, acclimated stock: target 12–14% MC before machining; document readings in QA logs.
Adhesives
– Two-part structural epoxy (amine-cured), medium viscosity for wetting end grain, with a pot life of 20–40 minutes at 25–30°C; thixotropic variants for overhead or vertical applications.
– Reference performance testing such as ASTM D1002 (lap shear) and manufacturer TDS for wood bonding. For oily species, ensure wipe-down with solvent and a controlled “open time” before seating inserts.
Hardware
– Concealed mortise hinges in stainless (e.g., 303/304) for doors and lids.
– Epoxy-coated slides and runners in humid storage zones; check salt-spray performance where stated.
– Embedded mounting rails or aluminum cleats isolated from dissimilar metals to prevent galvanic action.
Finishes
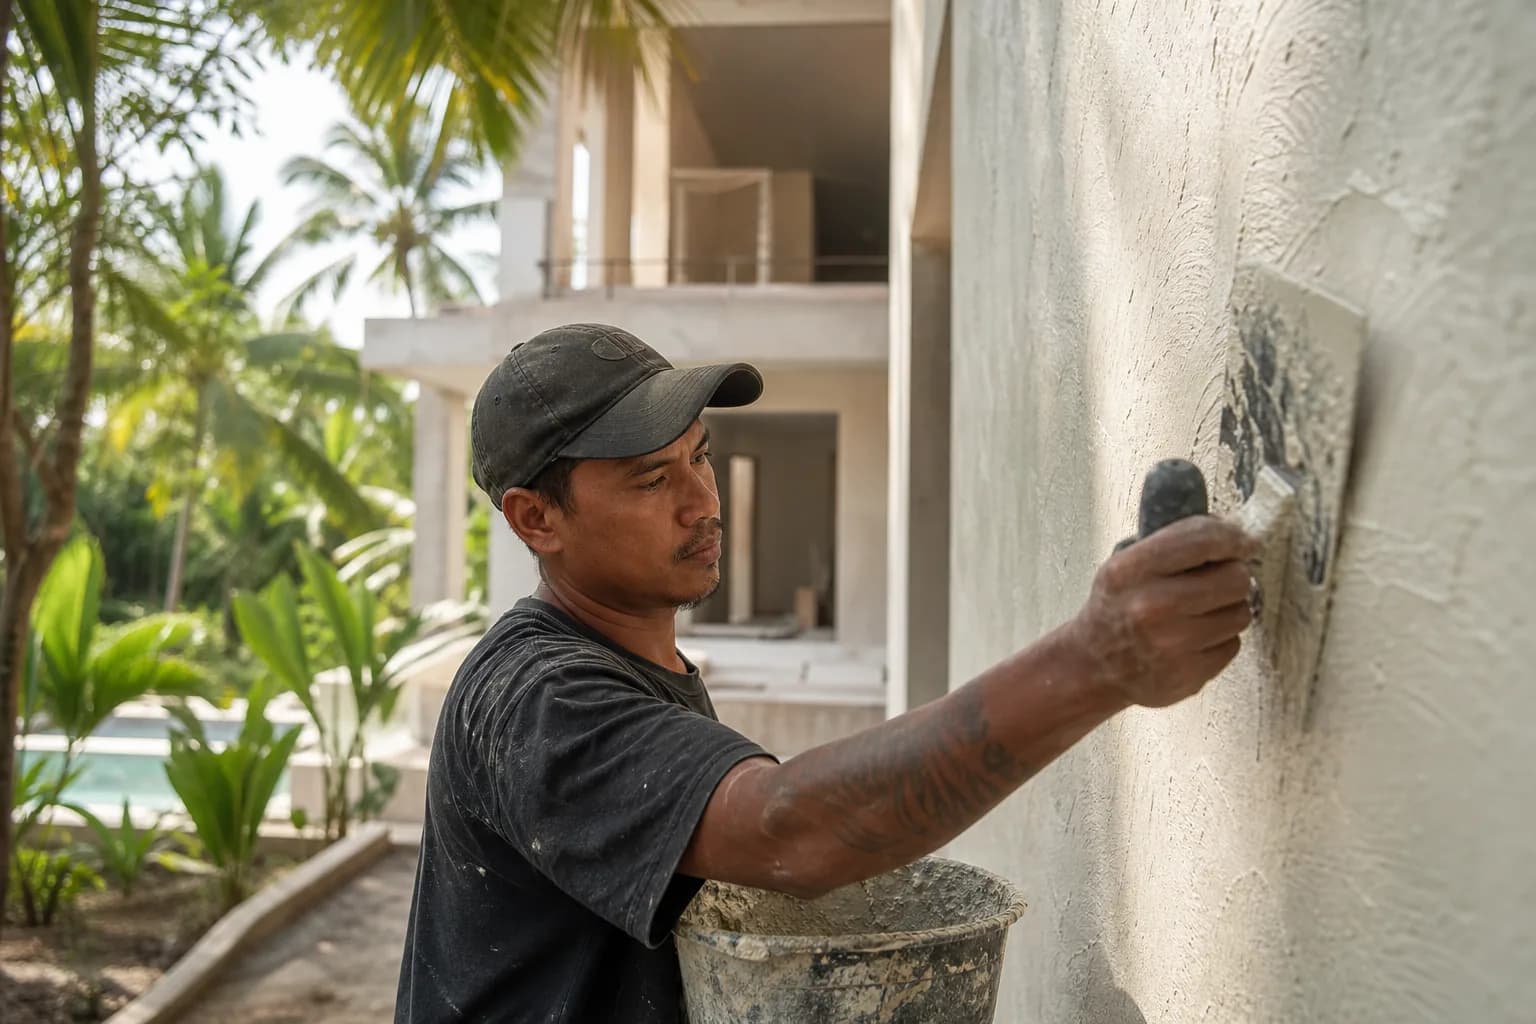
– Seal all cutouts and cavities with sealer/epoxy primer to reduce moisture wicking.
– Use catalyzed lacquer or 2K polyurethane in high-humidity interiors; maintain finish continuity around fixing points.
Standards & local practice
– Fastener selection per ISO 3506; corrosion category per ISO 12944 guidance (C3–C4 typical near coast).
– Timber moisture and installation tolerances aligned with good practice from EN 1995-1-1 principles for timber structures (adapted to joinery scale).
– Safety: VOC and occupational handling per epoxy MSDS; ensure ventilation and PPE.
Teville applies internal checklists aligned with our construction process controls: teville.com/how-we-build/.
4) Step-by-Step Process (Teville Method)
1. Briefing and mock-up
– Confirm architectural intent: zero visible fixings, shadow-gap planning, service access strategy.
– Select stainless grade (304 vs 316) per room exposure.
– Build a sample corner or panel with inserts and final finish for sign-off—critical in furniture installation and renovation Bali where matching existing tones matters.
2. Material conditioning
– Acclimate timber/panels on site 5–7 days. Record MC; reject boards >16% MC.
– Pre-seal end grain in high-risk zones (bathrooms, kitchens) with thin epoxy or sealer to limit future uptake.
3. Layout and drilling
– Mark fixing grid from datum lines; avoid veneer seams and weak edge distances (minimum 2–2.5× insert OD from edge).
– Drill pilot holes with sharp brad-point or Forstner bits; depth control with stop collars. Deburr and micro-chamfer edges to prevent fiber lift beneath finishes.
– Vacuum extract dust; dry-fit inserts to verify thread engagement and clearance to face.
4. Surface preparation for epoxy
– Wipe oily species with acetone or appropriate solvent; allow to flash off fully.
– Lightly abrade insert exterior with 120–180 grit to promote adhesion; degrease stainless. Keep gloved handling to avoid contamination.
5. Epoxy mixing and wet-out
– Mix by weight per manufacturer ratio; scrape cup walls, transfer to a second cup (double-cup method) to avoid unmixed streaks.
– For end-grain or porous cores, pre-wet holes with low-viscosity epoxy to ensure fiber saturation.
– For vertical holes, use thixotropic epoxy or colloidal silica-thickened batch to avoid slump.
6. Insert setting
– Butter insert threads lightly; do not overfill to prevent hydraulic pressure cracking.
– Seat inserts with a driver and depth stop; rotation should be smooth with moderate torque. Confirm alignment so bolts enter square without cross-threading.
– Clean squeeze-out immediately with solvent; maintain a neat cavity for subsequent finishing.
7. Curing and stability checks
– Respect pot life and gel time at ambient Bali temperatures (often 28–32°C). Protect from direct sun to avoid excessive exotherm.
– After initial cure (typically 8–12 hours), verify torque resistance with a calibrated driver; log values for QA.
8. Assembly with concealed hardware
– Fit stainless concealed hinges to mortised pockets; confirm reveal lines and soft-close action where specified.
– Mount carcasses or panels using rear-access bolts into the inserts; use slotted brackets to allow seasonal movement while keeping faces flush.
– For drawers, install epoxy-coated slides; check alignment and preload to eliminate rattle.
9. Finishing integration
– Seal cut edges and cavities with compatible sealer; avoid contaminating mating surfaces.
– Apply topcoats (2K PU or catalyzed lacquer). Mask insert mouths as needed; remove masking before final bolt-up to prevent bonding of mechanical threads.
10. Commissioning and handover
– Cycle doors/drawers 50–100 times; recheck torque on critical points (shelves, large doors).
– Provide client care guide: humidity management, cleaning agents safe for stainless and finishes, periodic checks after the first wet season.
For complex scopes—curved panels, stone/wood interfaces, or integrated villa utilities access—Teville prepares shop drawings and install sequences tied to the broader construction program. See how we coordinate trades at: teville.com/how-we-build/.
5) Costs & Timeline
Typical cost components (order-of-magnitude)
– Stainless inserts and hardware: IDR 8,000–35,000 per insert/bolt set depending on grade (304 vs 316) and size; specialty concealed hinges: IDR 350,000–1,500,000 per pair.
– Structural epoxy: IDR 250,000–600,000 per 400–1000 g kit (project mix design determines consumption).
– Labor (skilled finishing carpentry): IDR 180,000–350,000 per point for drill, prep, set, QA; complex assemblies higher.
– QA, mock-ups, and finishing integration: 5–10% of joinery package.
Program duration
– Mock-up and approvals: 3–7 days.
– Material conditioning: 5–7 days (can overlap with other trades).
– Insert setting and concealed hardware install: 1–3 days per room set (wardrobes/vanities), depending on point count and access.
– Curing buffer: 12–24 hours before load; 3–7 days for full epoxy cure in humid conditions.
– Final finishing and commissioning: 2–4 days.
Lead times depend on hardware grade (316 may require special order). Teville sequences these works to minimize re-handling and protect finished surfaces, coordinating with stone, glazing, and MEP trades. For budget guidance aligned to your scope, start here: teville.com/order-form/.
6) FAQ Block
A: For most dry interiors, yes. In coastal-facing rooms, wet areas, or high-ventilation spaces with salt air, we recommend 316 to minimize pitting and tea-staining.
A: Yes, with correct prep—solvent wipe, light abrasion, and timely application within the open window. Pre-wetting end grain improves fiber saturation and bond reliability.
A: The epoxy secures the insert in the substrate; the mating bolts remain removable. This is ideal for service panels over villa utilities and for future renovation Bali works.
A: Quality stainless concealed hinges provide comparable or better action and longevity, especially in humid environments. Specify cycle rating and load class to match door size.
Available lands
 18900 m²2 min$ 6912931Bali, Pecatu
 2115 m²5 min$ 1139547Bali, Pererenan
 220 m²2 min$ 66565Bali, Cemagi
 700 m²15 min$ 90517Bali, Central Bali
 2000 m²5 min$ 738916Bali, Ungasan
 1600 m²32 min$ 266010Bali, Tabanan
 770 m²5 min$ 163578Bali, Kedungu
 600 m²12 min$ 101970Bali, Mengwi
 3000 m²15 min$ 1246921Bali, Tabanan
 260 m²5 min$ 51872Bali, Kedungu
 1000 m²10 min$ 280788Bali, Pecatu
 550 m²15 min$ 164594Bali, Mengwi
 585 m²8 min$ 165702Bali, Mengwi
 3100 m²15 min$ 257697Bali, Tegallalang
 300 m²55 min$ 32475Bali, Tegelalang
Planning a build in Bali?
Get a feasibility view, budget range and timeline from Teville.
Related guides
Resin-Infused Plaster Finishes: Anti-Salt Systems Bali
Expert technical guide: Resin-Infused Plaster Finishes: Anti-Salt Systems Bali
8 min read
Prefinished Timber Joinery: Silicone Seals Fixings Bali
Professional prefinished timber joinery installation in Bali with silicone seals and fixings for durable weatherproof performance and a premium finish.
10 min read
Polished Concrete Microtopping: Surface Prep Sealants Bali
Discover Bali s polished concrete microtopping: expert surface prep, durable sealants, and a flawless finish for modern floors with minimal maintenance.
9 min read