Waterproofing Bali Wet Rooms: Cementitious Membrane Specs
Waterproofing Details for Bali Wet Rooms: Cementitious Membrane Specs
Persistent moisture, salt-laden air, and warm temperatures make Bali’s wet rooms unforgiving. The specific problem: how to detail and install a cementitious waterproofing membrane that survives daily showers, steam, and intermittent hydrostatic pressure without blistering, pinholing, or leaking into adjacent bedrooms, custom joinery, or villa utilities chases. This Bali area guide focuses on one process only—cementitious membrane waterproofing for wet rooms—so interior finishing Bali projects and renovation Bali upgrades achieve durable, clean finishes that last through monsoon seasons and heavy villa occupancy.
Technical Deep Dive: Why Cementitious Membranes for Bali Wet Rooms
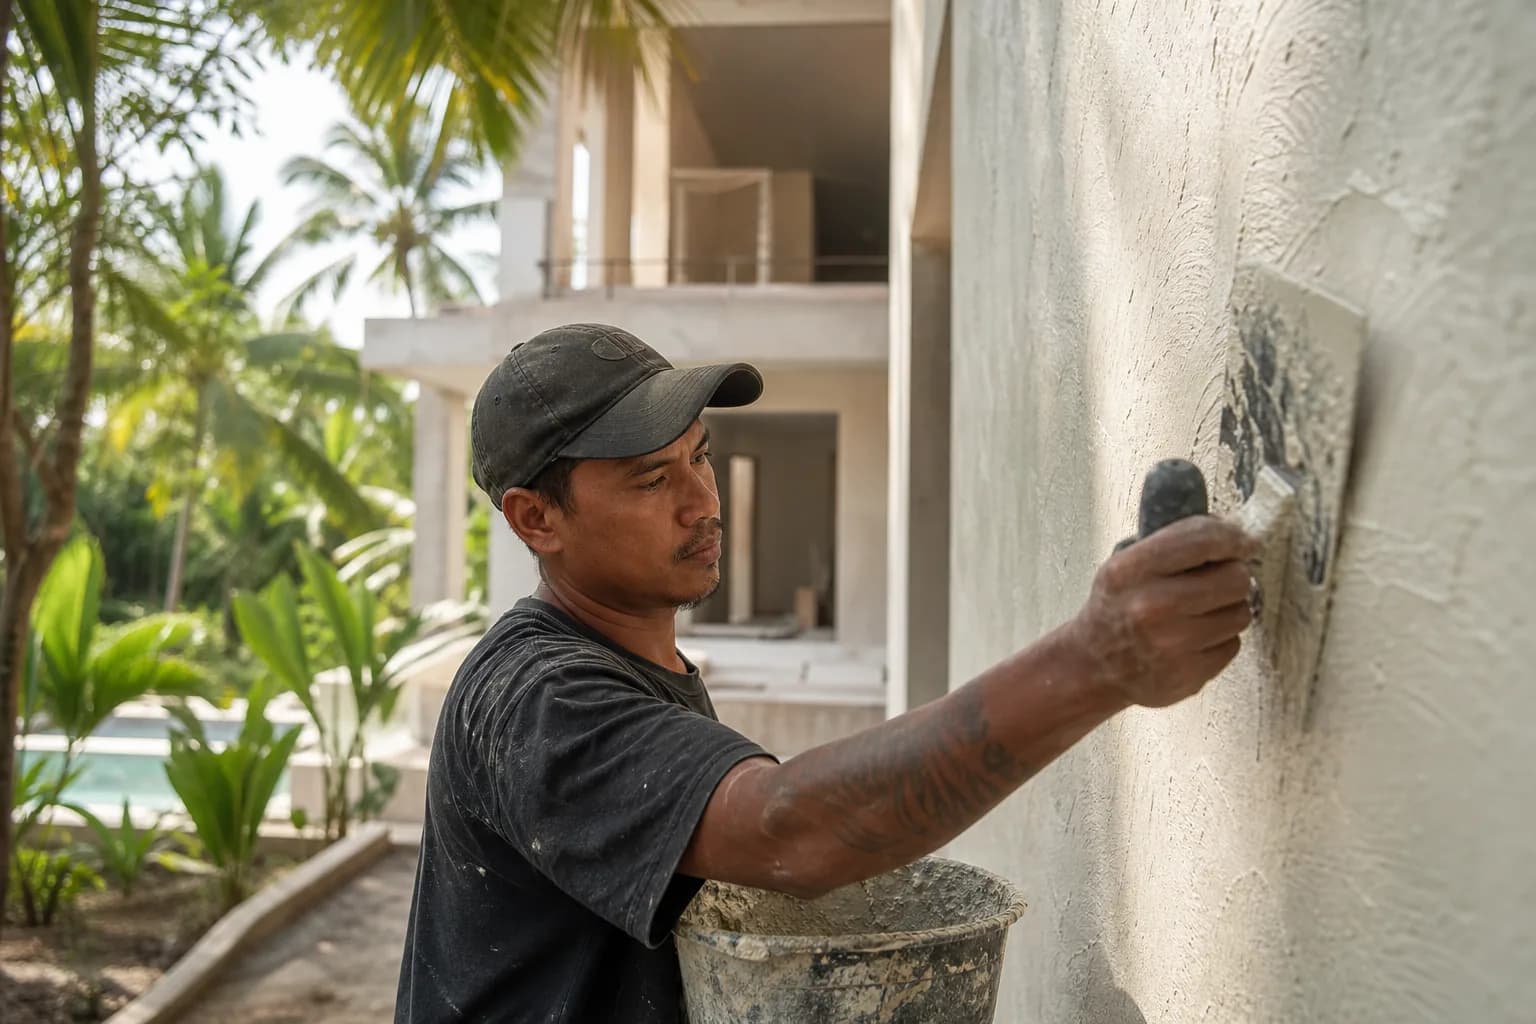
In Bali villa construction, wet rooms—showers, ensuites, steam areas, pool bathrooms, and spa rooms—are exposed to constant water spray and intermittent hydrostatic pressure when drains momentarily back up or when rain events coincide with full occupancy. Cementitious waterproofing membranes are a preferred solution in these spaces because they bond monolithically to mineral substrates (concrete, cement render, screeds) and tolerate damp environments better than many organic coatings. Their cement base matches the dimensional movement and vapor permeability of the substrate, reducing risks of delamination under tropical temperature swings.
For 2026, a proven product class is exemplified by HYDRO BAN Cementitious Waterproofing Membrane by LATICRETE, which is listed for hydrostatic pressure resistance up to 2 BARS, is designed for showers, balconies, and pools, and can be applied to concrete after a minimum 14 days of curing when substrate conditions allow. This capacity matters in Bali where occasional negative-side moisture and brief standing water events occur. However, hydrostatic capacity is only as reliable as detailing—especially at plane changes, linear drains, internal niches, and around MEP penetrations.
Key design and installation considerations in Bali’s tropical environment:
- Vapor, not only liquid: Wet rooms in humid climates experience vapor pressure pushing outward. Cementitious membranes accommodate vapor diffusion while remaining watertight, reducing blistering risks common to non-breathable films over damp screeds.
- Substrate movement: Thermal cycling and micro-movements around lightweight partitions and door thresholds cause stress. Use bond breakers or reinforcing fabric at all changes of plane; specify movement joints through tilework to the membrane level where required.
- Drain integration: Bali villas frequently use linear drains and stone slabs. Membrane continuity into the drain flange or clamping ring is non-negotiable. Preformed collars or fabric reinforcement with compatible sealants ensure a leak-free tie-in.
- Slope to drain: Minimum 1–2% fall in screeds is essential. Membranes are not a substitute for slope; ponding increases microbial growth and tile discoloration, and strains seams.
- Tropical curing: High humidity slows water evaporation in cementitious layers; protect from rain, purge condensate, and allow extended curing before flood testing and tiling as per datasheet guidance.
- Natural stone sensitivity: Bali projects often specify limestone or marble. Cementitious membranes minimize soluble plasticizer migration and are typically compatible with high-alkaline backings, helping avoid staining when paired with low-porosity, polymer-modified thin-set.
From a finishing perspective, the membrane is the last line before tile and joinery. Incomplete coverage at the toe of cabinets, thresholds, and vanity supports leads to concealed rot in furniture installation and wicking into plywood or MDF. Therefore, the membrane must extend beneath or behind interfaces where splashes occur, and terminations must be mechanically protected before carpentry enters the room.
Teville’s control philosophy emphasizes measurable outcomes: confirm substrate moisture is within manufacturer limits; measure wet film thickness during application; verify dry film thickness (DFT) via spot checks; and perform a witnessed 24-hour flood test (or longer if required by product literature). These steps ensure a durable, maintainable envelope for premium interior finishing Bali standards.
Materials & Standards
Core waterproofing materials for Bali wet rooms using a cementitious membrane system typically include:
- Cementitious waterproofing membrane: A two-component or pre-blended compound designed for positive-side waterproofing in wet areas. Example: HYDRO BAN Cementitious Waterproofing Membrane by LATICRETE (rated up to 2 BARS hydrostatic pressure; suitable for showers, balconies, pools; applicable over concrete after minimum 14 days of cure, subject to substrate condition). Reference: LATICRETE PDS.
- Reinforcing fabric or mesh: Alkali-resistant fabric to embed at all corners, changes of plane, substrate transitions, around floor wastes and penetrations, and over static cracks per manufacturer instructions.
- Bond breaker/sealant: Neutral-cure, compatible sealant to form a debonded fillet at internal corners where movement is expected, before fabric and membrane applications.
- Primers (if required): Some porous or highly absorbent substrates benefit from a primer specified by the membrane manufacturer. Follow the exact product pairing.
- Cement-sand screed and repair mortars: Polymer-modified, shrinkage-compensated materials for slope correction and surface regularization to achieve 1–2% falls.
- Tile adhesive: High-performance, polymer-modified cementitious thin-set compatible with the membrane and chosen tile/stone; comply with manufacturer requirements for bond to cementitious waterproofing.
- Grout and sealants: Flexible, mould-resistant grout; compatible movement-joint sealants for perimeter and intermediate control joints.
Standards and practice notes relevant to Bali villa construction and renovation Bali work:
- Follow the membrane manufacturer’s datasheet for substrate conditions, mixing, coverage, thickness, curing, and flood testing.
- Adhere to good Indonesian building practice and local authority requirements for wet areas and waterproofing; document QA checks and flood tests prior to tiling.
- Tile assemblies should follow recognized international guidance for wet areas, including slope requirements, movement joint placement, and drain integration best practices.
- Where natural stone is specified, confirm stone sensitivity and ensure adhesive and grout systems are suited to porous or moisture-sensitive stone to prevent discoloration.
As a finishing quality expert, Teville coordinates materials so each layer is compatible in the system stack, from screed to membrane to adhesive to tile and silicone joints, with a focus on durability in Bali’s tropical climate.
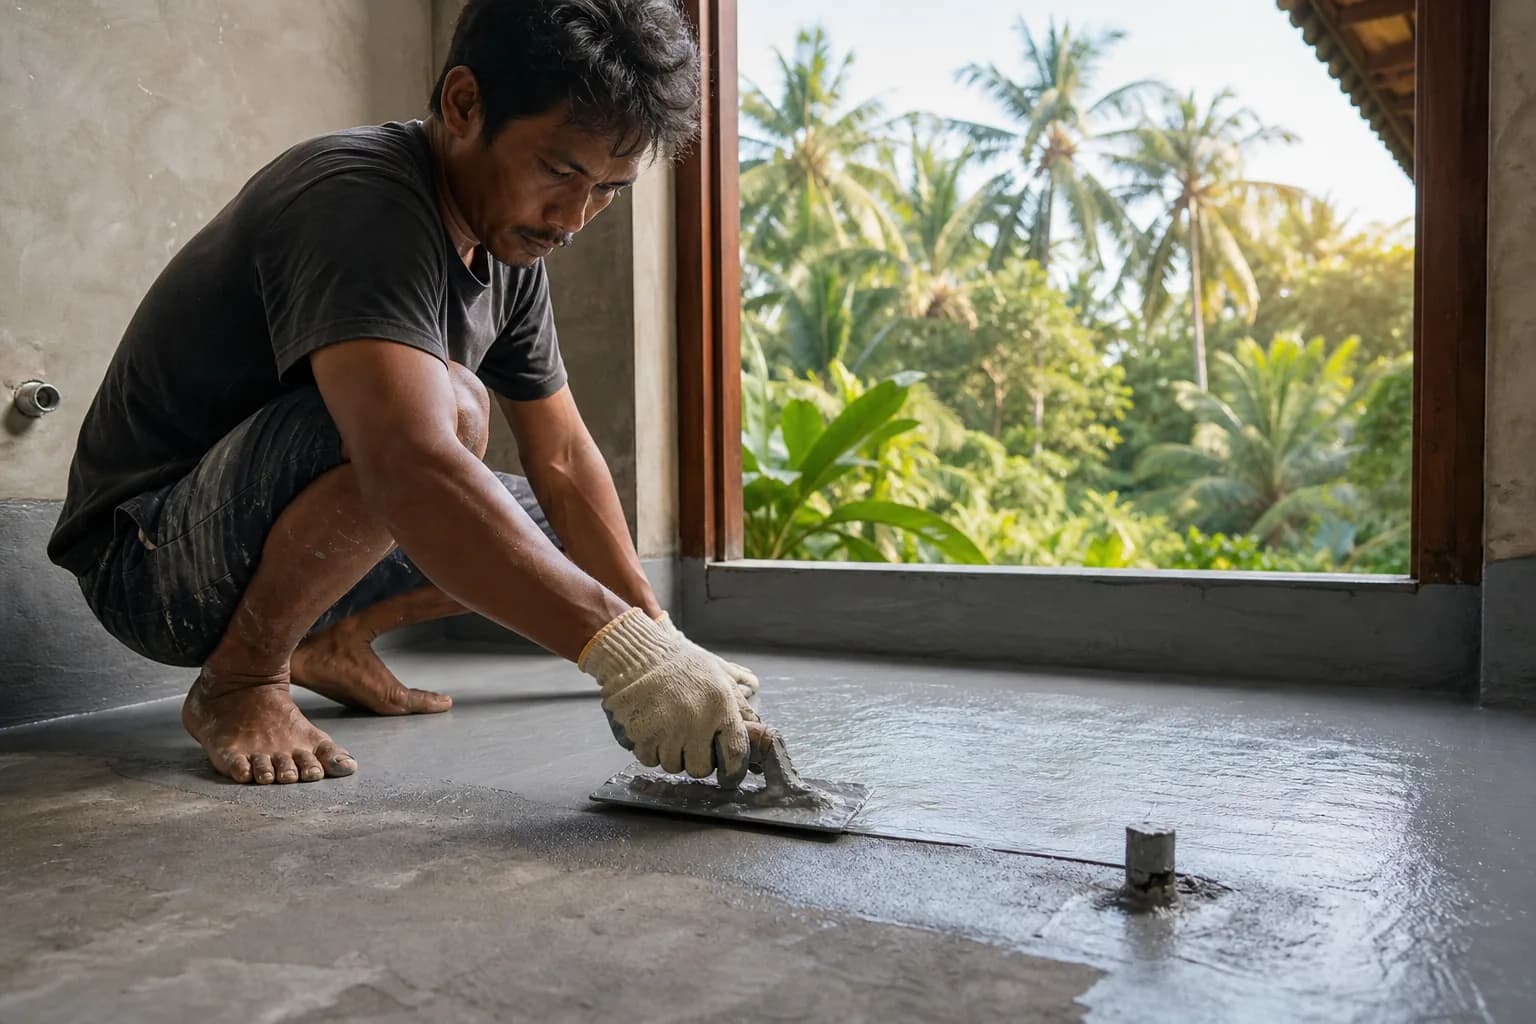
Step-by-Step Process (Teville Method)
1) Pre-design detailing
- Confirm wet room boundaries, splash zones, and membrane extents. Extend 150–200 mm up walls at a minimum; higher where hand showers or spray are present.
- Specify linear or point drains with compatible flanges/clamping rings for cementitious membranes. Detail how the membrane laps into the drain assembly.
- Set screed slopes (1–2%) toward drains; avoid flat areas at door thresholds and under benches.
- Coordinate MEP penetrations (villa utilities) so sleeves, mixer bodies, and floor wastes accept collars and reinforcement without crowding.
2) Substrate preparation
- Concrete/screed cure: Minimum 14 days for concrete as indicated by the referenced LATICRETE product; ensure substrates are dimensionally stable and free from laitance.
- Moisture assessment: Surface must be sound and not water-saturated. Remove standing water and surface film. Follow manufacturer’s moisture limits before application.
- Surface profiling: Mechanically abrade or scarify weak surfaces. Remove contaminants (oil, curing agents, gypsum residues). Vacuum clean thoroughly.
- Slope and repairs: Form falls with polymer-modified screed; patch voids and honeycombs with compatible repair mortar. Achieve a smooth, closed finish with no sharp arrises.
- Corners and coves: Create a neat 10–15 mm radius fillet with bond breaker/sealant at internal corners to reduce stress concentration.
3) Priming and pre-treatment
- Primer: Apply manufacturer-recommended primer if the substrate is highly absorbent or dusty. Avoid over-priming that could impede bond.
- Crack treatment: Pre-bridge non-structural cracks as directed (clean, fill, and reinforce). Structural cracks require engineering review.
- Penetrations: Install collars or fabric around pipe penetrations and mixer boxes with compatible sealant. Ensure minimum lap widths per datasheet.
4) Mixing the cementitious membrane
- Measure precisely: Combine powder and liquid per manufacturer’s ratio; mechanical mix at low speed to avoid entraining air.
- Induction/rest: Allow the blend to rest briefly if required, then remix to a creamy, brushable/rollable consistency.
- Pot life: Respect working time; discard material beyond pot life, especially in Bali’s heat where pot life shortens.
5) Application—first coat
- Apply by brush/roller/trowel to achieve the specified wet film thickness. Use a wet film gauge to confirm coverage.
- Immediately embed reinforcing fabric at all plane changes, junctions with drains and thresholds, and around penetrations; fully wet out the fabric without wrinkles.
- Feather laps: Maintain required overlaps between fabric sections; ensure no pinholes or dry spots.
6) Application—second coat (cross coat)
- After the first coat attains the manufacturer’s recoat condition (tack-free and firm), apply a cross-directional second coat to reach total DFT per datasheet.
- Detail edges and terminations beneath cabinetry plinths, door thresholds, and niche shelves to protect future furniture installation and timber elements.
- Drain interface: Form a smooth, continuous membrane into the drain flange/clamp zone as detailed; remove excess to keep clamp faces clean before final assembly.
7) Curing and protection
- Protect from rain, spray, and foot traffic. Bali humidity can slow cure; provide ventilation without direct airflow that may cause surface skinning.
- Do not accelerate with heat guns or direct sun; allow natural cure per datasheet guidance.
8) Flood testing
- Perform a witnessed flood test once the membrane has cured per manufacturer instructions. In tropical conditions, this is often extended; verify onsite dryness and cure.
- Maintain a minimum 24-hour water hold (or as specified). Mark water line; inspect below for leaks, especially at ceilings under the wet room.
9) Tile installation
- Use a compatible polymer-modified thin-set. Avoid notching that damages the membrane; use the proper trowel size and back-butter large-format tiles.
- Respect movement joints. Seal perimeter and intermediate joints with compatible elastic sealants, not grout.
- For sensitive stones common in Bali, confirm adhesive and grout suitability and conduct a small test panel.
10) Handover and maintenance
- Record batch numbers, thickness measurements, and flood test results in the project QA file.
- Educate housekeeping on mild cleaners; harsh chemicals or abrasive pads can degrade sealants and joints over time.
See how Teville manages sequencing with other trades in our construction process overview: How We Build. Explore executed finishes in our portfolio: Portfolio and Villa Projects.
Costs & Timeline (Bali Context)
Budgeting helps align finishing quality with program. Typical ranges for a premium cementitious waterproofing scope in Bali (materials + labor, excluding tile/stone):
- Standard wet room (straight walls, single drain): IDR 250,000–450,000 per m²
- Complex detailing (niches, benches, linear drains, multiple penetrations): IDR 400,000–700,000 per m²
- QA and testing (mock-up, flood test setup/monitoring): IDR 30,000–60,000 per m²
Drivers of cost variation:
- Substrate correction (re-screeding to correct fall)
- Drain type and number (linear drains require meticulous interface detailing)
- Stone vs. ceramic tile (affects adhesive/grout system selection)
- Access and protection needs in ongoing renovation Bali settings
Indicative timeline per wet room, assuming materials on site and normal humidity:
- Day 1–2: Surface prep, slope correction, crack treatment
- Day 3: Primer (if required), first membrane coat with fabric
- Day 4: Second coat and detail work
- Day 5–7: Cure and flood test (duration per datasheet and climate)
- Day 8+: Tile installation begins
Total 1–2 weeks per wet room is typical depending on curing, complexity, and inspection cycles. For villa-wide programs, Teville sequences rooms to maintain progress without compromising cure times. For tailored estimates, use our cost tool: Cost Estimation.
FAQ: Cementitious Membrane Waterproofing in Bali Wet Rooms
Can I apply the membrane on green concrete?
Follow the manufacturer’s minimum cure time. The referenced LATICRETE product allows application on concrete after at least 14 days, provided the surface is sound and not water-saturated. Always verify substrate condition; excessive moisture can slow cure and affect adhesion.
What hydrostatic resistance do I need for a shower?
Showers mainly face positive-side liquid water and brief ponding. A system rated up to 2 BARS provides a strong safety margin for wet rooms and is appropriate for balconies and pools as well. Detailing quality is equally critical—

Want to calculate?
 3124 m²6 month(s)from 123.000 USD
TALA 8
 3173 m²6 month(s)from 125.000 USD
TALA FOUR
 2144 m²11 month(s)from 104.000 USD
Narayana
 4344 m²16 month(s)from 290.000 USD
Radha
 3104 m²11 month(s)from 99.000 USD
TALA 100
 1from 198.000 USD
Private: Haridas Villas
 3180 m²7 month(s)from 142.000 USD
Vasudeva
 3127 m²9 month(s)from 177.000 USD
Mukunda
 164 m²7 month(s)from 79.000 USD
TALA TWO
164 m²7 month(s)from 79.000 USDPrivate: Haridas Villas, Tegallalang
 172 m²8 month(s)from 120.000 USD
Keshava
Start With Real Numbers, Not Guesses
Before finalizing your finishing works plan, check realistic cost ranges for your Bali villa project.
Available lands
 1700 m²10 min$ 392549Bali, Nusadua
 550 m²15 min$ 164594Bali, Mengwi
 2400 m²7 min$ 496552Bali, Canggu
 2800 m²2 min$ 713793Bali, Kedungu
 7500 m²5 min$ 206281Bali, Kedungu
 610 m²10 min$ 165271Bali, Seminyak
 585 m²8 min$ 165702Bali, Mengwi
 3800 m²15 min$ 100616Bali, Pererenan
 2130 m²10 min$ 495776Bali, Pecatu
 700 m²15 min$ 109052Bali, Buduk
 1230 m²15 min$ 132543Bali, Tegallalang
 1158 m²12 min$ 291996Bali, Mengwi
 5815 m²5 min$ 815740Bali, Tabanan
 700 m²15 min$ 90517Bali, Central Bali
 928 m²15 min$ 910123Bali, Pererenan
Planning a build in Bali?
Get a feasibility view, budget range and timeline from Teville.
Related guides
Resin-Infused Plaster Finishes: Anti-Salt Systems Bali
Expert technical guide: Resin-Infused Plaster Finishes: Anti-Salt Systems Bali
8 min read
Prefinished Timber Joinery: Silicone Seals Fixings Bali
Professional prefinished timber joinery installation in Bali with silicone seals and fixings for durable weatherproof performance and a premium finish.
10 min read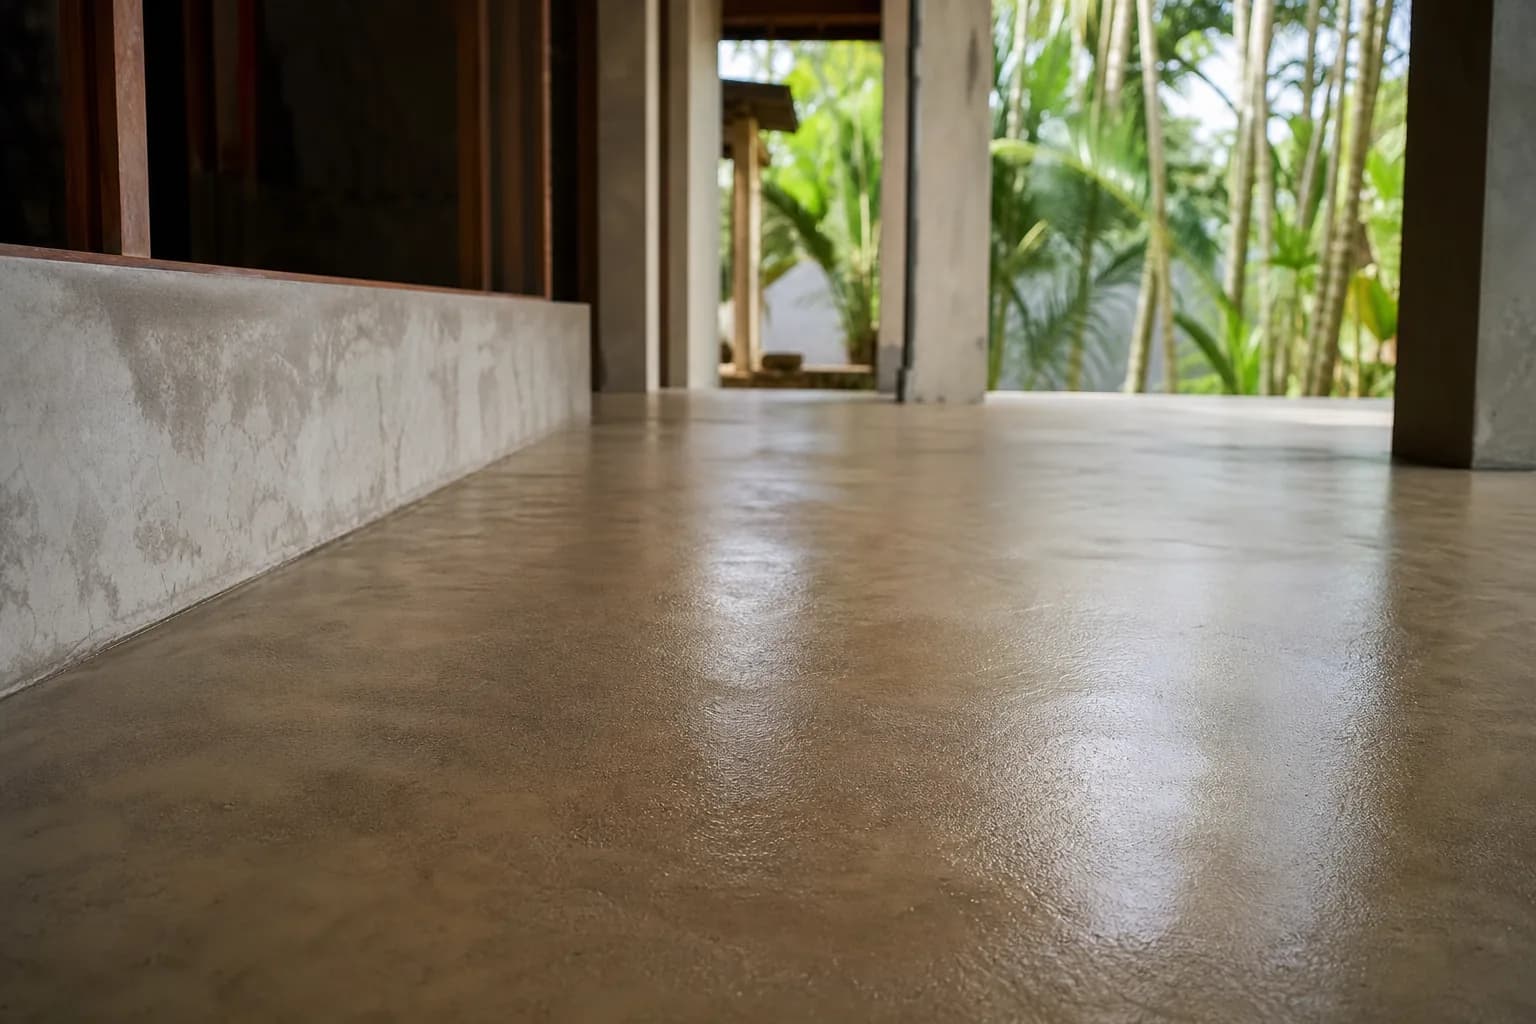
Polished Concrete Microtopping: Surface Prep Sealants Bali
Discover Bali s polished concrete microtopping: expert surface prep, durable sealants, and a flawless finish for modern floors with minimal maintenance.
9 min read